Product Support
PortalPass
Attachments
Adding an Attachment to a Claim
Completing a Payer Request for Additional Details
Creating a Custom Attachment Rule
Creating a Stand Alone Attachment
Download the Attachment Tool
FAQs for AttachmentConnect
Locating the Attachment Payer List
Searching for a Claim with Attachments
Using Capture All Attachments
Statements
Claims
Add or Change Billing Information
Adding Users to DentalXChange
Change Practice Management System
Correcting a Validation Error
Download the Batch Upload Tool
FAQs for ClaimConnect
Frequestly Asked Questions for the DentalXChange Management Desktop
Medi-Cal Dental: Add Payer Claim ID from NOAs to Claims on Submission
Registering for DentalXChange
Resetting DentalXChange Password
Submitting a Claim Directly on DentalXChange
Uploading a Batch Claim File
Credentialing
Credentialing For Providers
Creating an Application
FAQ's for Providers using CredentialConnect
Adding Approvals From Payers
Creating a New Account with CredentialConnect
How to Edit Locked Application Fields
How to Update Expiring Supporting Documents
Introduction to CredentialConnect for Providers
Password Recovery
Payer Messages
Submitting an Application Via Email
Understanding the Homepage
Username Recovery
System Requirements for CredentialConnect
Uploading Files to CredentialConnect
Eligibility AI
Payer Portals- Credential Creation
Ameritas
Carefirst
Cigna
DNoA
Delta Dental State Portals- AK, AR, CO, CT, IL, KS, MA, NJ, OK, OR, RI, SD, VA, WA, Northeast, Delta Covers Me
Delta Dental State Portals- IA, ID, MO, SC, WI, WY
DentalHub- Adding a New Team Member
Geha
Guardian
MetLife- Updating MFA Email
Metlife
Principal
United Concordia
FAQ's for Eligibility AI
Introduction to Eligibility AI
Reviewing Eligibility & Benefit Details
Add Payer Credential with Multi-Factor Authentication
Common Reasons for Failed Benefit Checks
Managing Payer Credentials
Manually Running an Eligibility Check
Notes and Benefit Customization
Merchant Services
CardPointe Portal
How to setup Payment Plans
Notifications & Alerts
Reconcile Merchant Services (PayConnect) Transactions
Video: How to Process a Refund
Video: How to Process a Void
Video: How to Set Up Payment Plans
Video: How to Use Text-to-Pay
Video: How to use the Virtual Terminal
Real-Time Eligibility
Electronic Remittance Advice
Enrollment
Partner Support
Principal

This article will walk you through how to create a new Principal credential to be used with Eligibility AI.
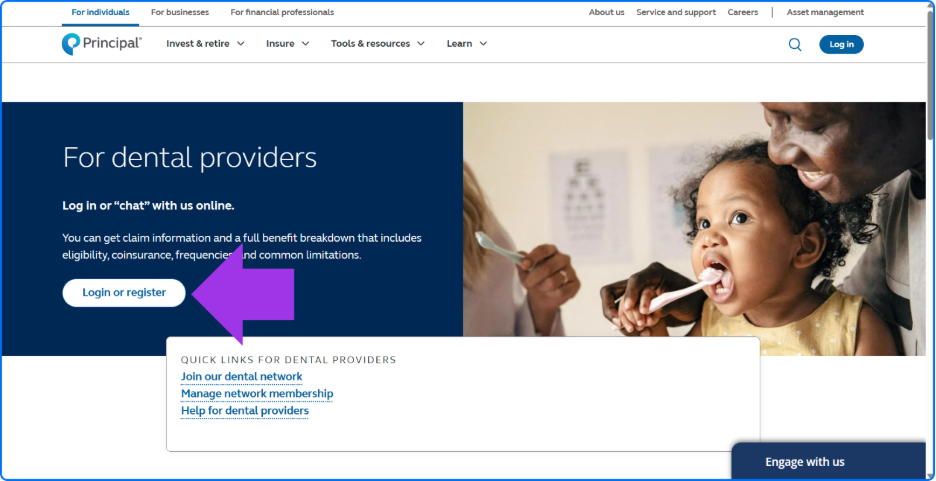
- Go to https://www.principal.com/dental-providers and choose “Login or Register” to create an account for a new user.
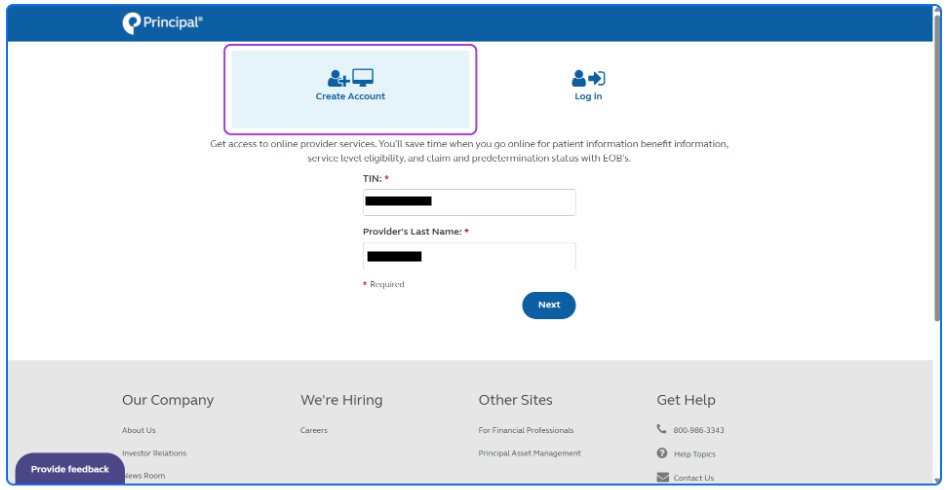
- To start, remain on the “Create Account” tab and enter the TIN and provider’s last name before clicking “Next”.
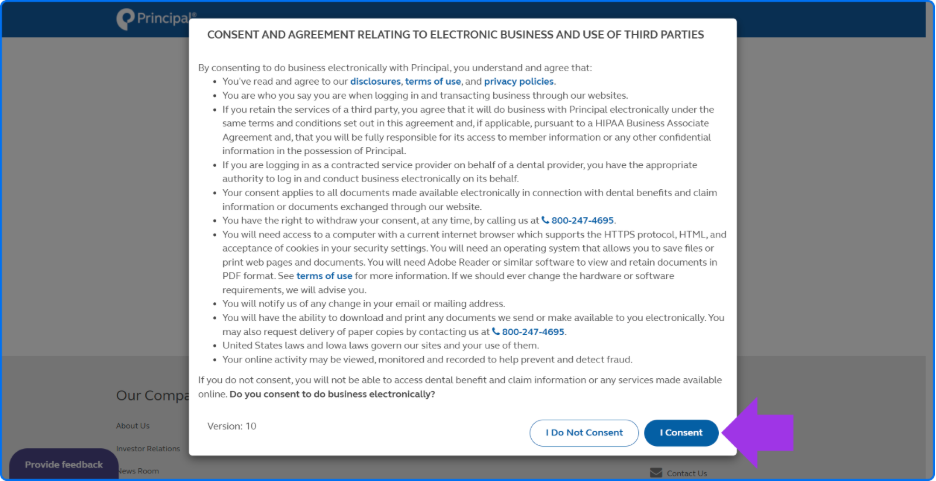
- Click “I consent” to agree to the terms and continue through the process.
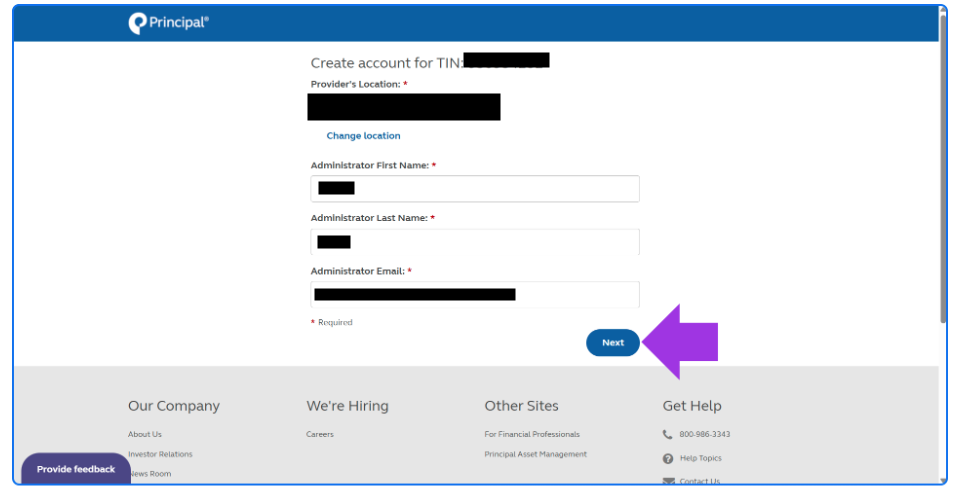
- Next, enter the Administrator's (user's) first and last name followed by the email address generated in Eligibility AI.
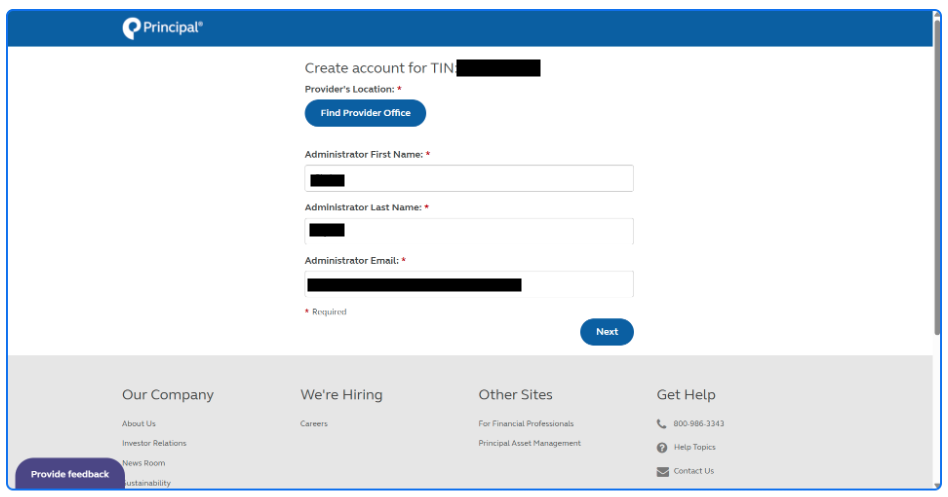
- Then, click “Find Provider Office” and search using the zip code or city. When the office address is found, click “Select Location”.
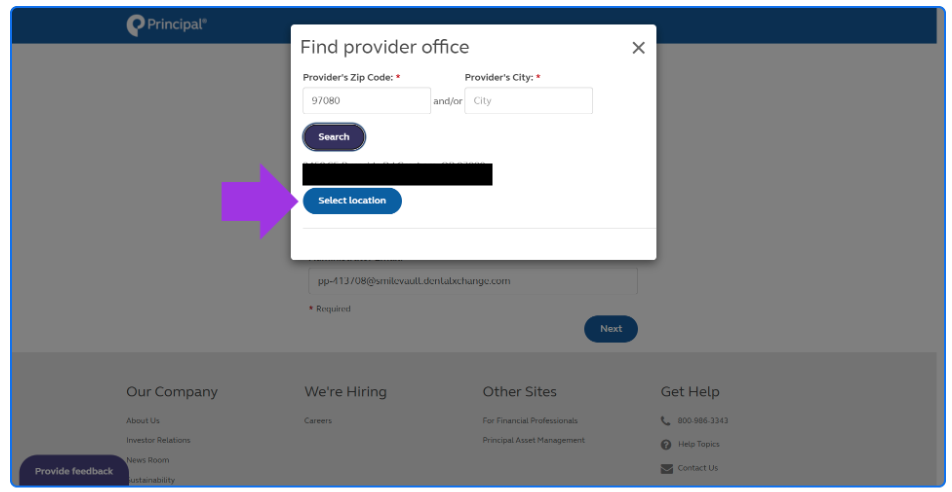
- Click “Next” to continue to the next step.
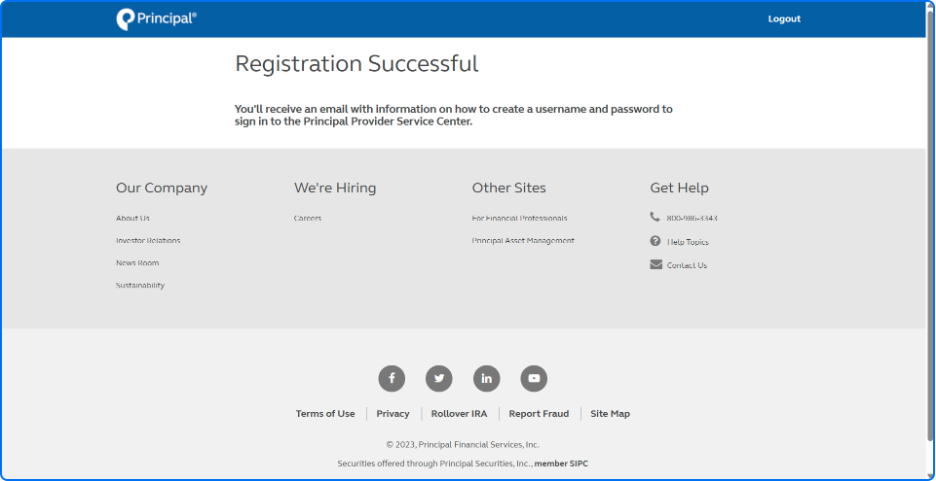
- A success message appears. Go to the Eligibility AI Inbox to complete the process.
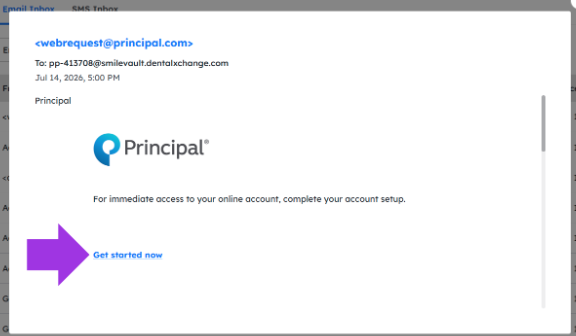
- View the email from Principal and click the “Get started now” link.
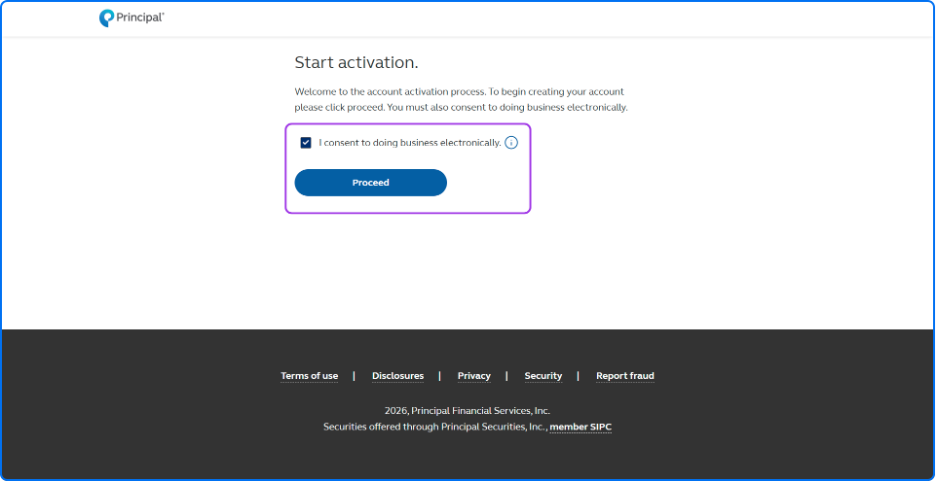
- Click the checkbox to consent to doing business electronically and then click “Proceed”.
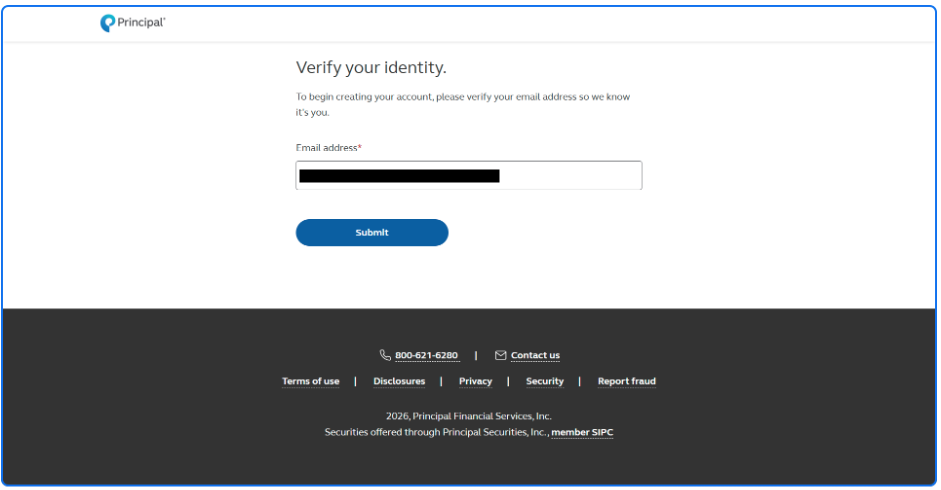
- Enter the Eligibility AI email address and click “Submit”.
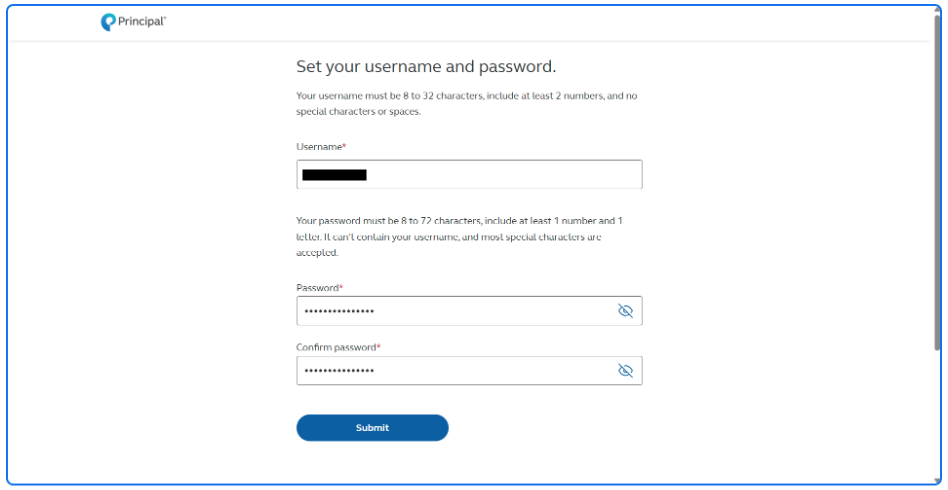
- Create a username and password then click “Submit”.
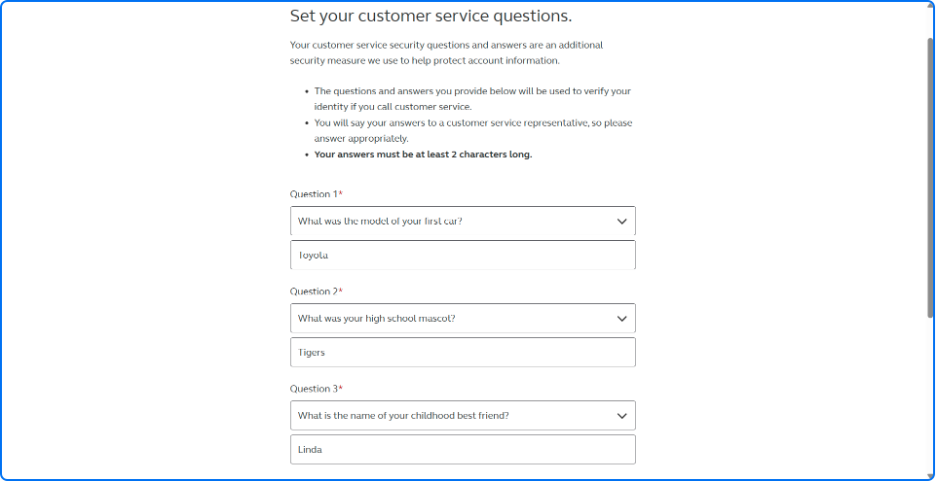
- Next, set the security questions and click “Submit”.
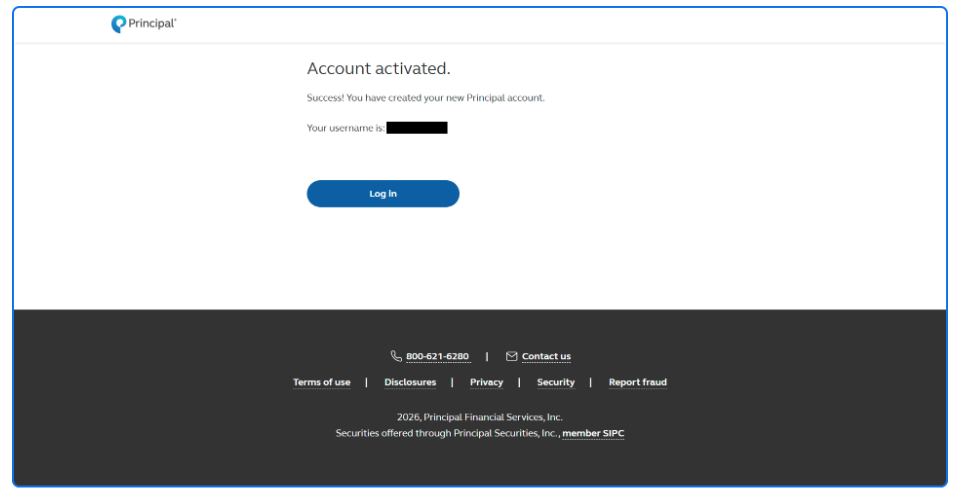
- The account is now active and can be accessed with the username and password. Click “Log In”.
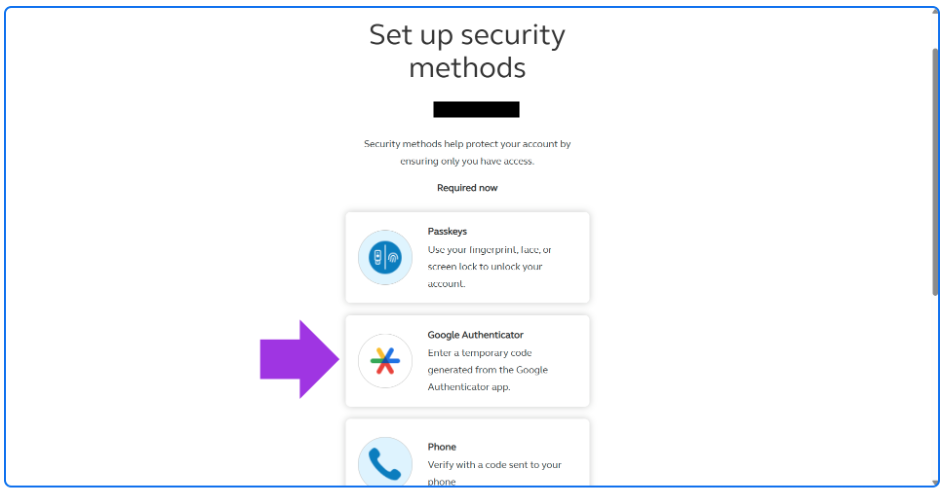
- To set up security methods, log in and choose the “Google Authenticator” option.
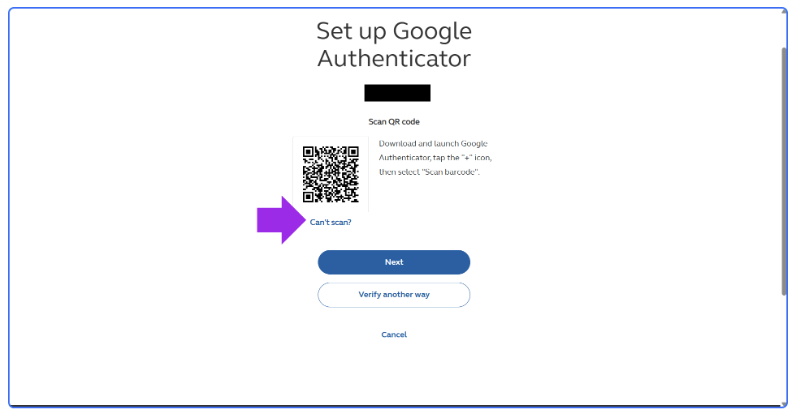
- Click “Can’t Scan?” under the QR code to view the setup key. This key will be copied and entered into Eligibility AI.
- Go to Eligibility AI and navigate to Administration > Payer Credentials and click "New Payer Credential".
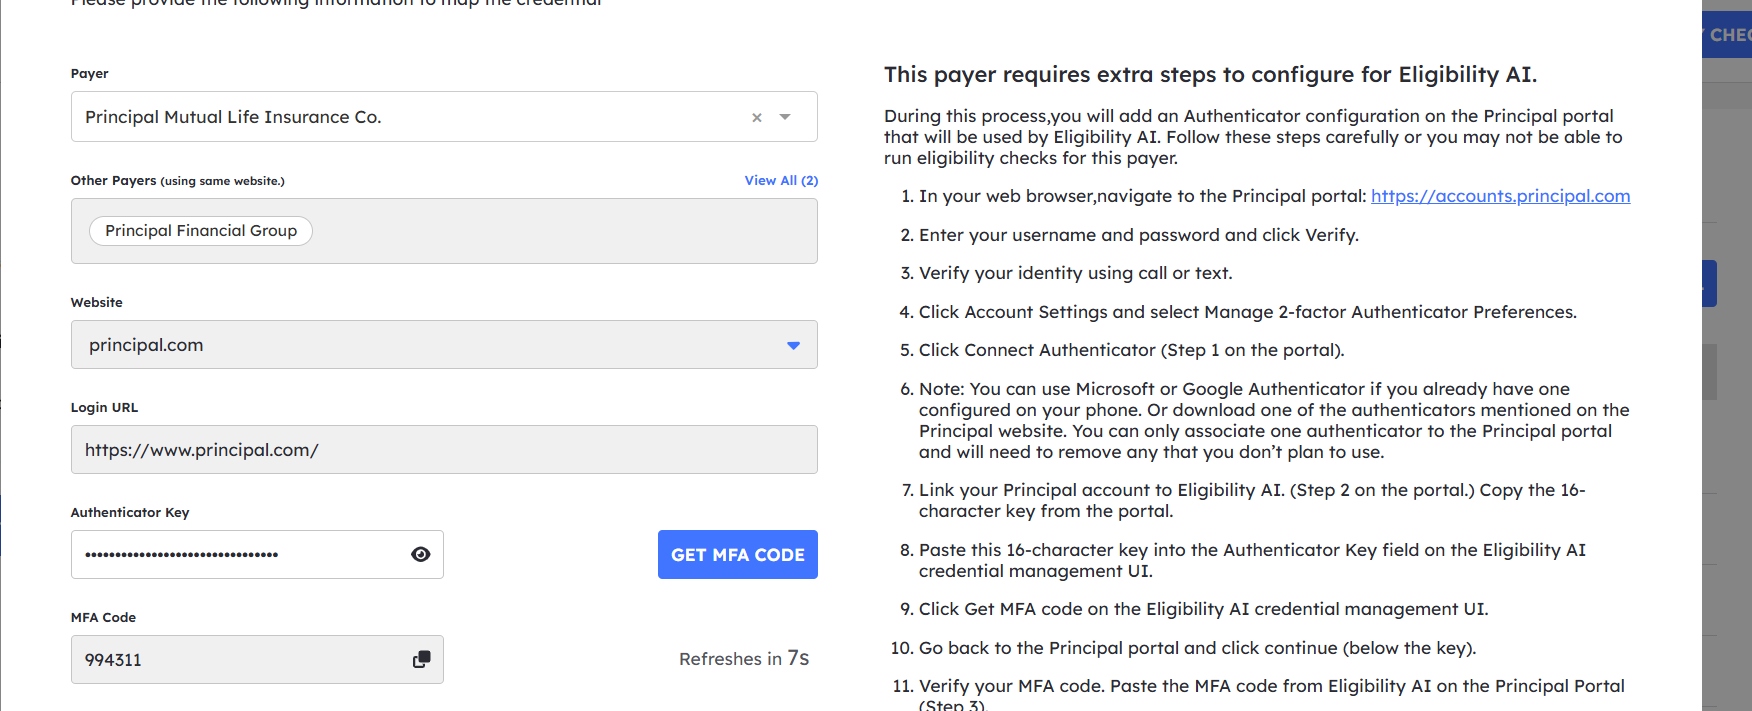
- Choose Principal as the payer and enter the required information. Paste the secret key into the Authenticator key field.
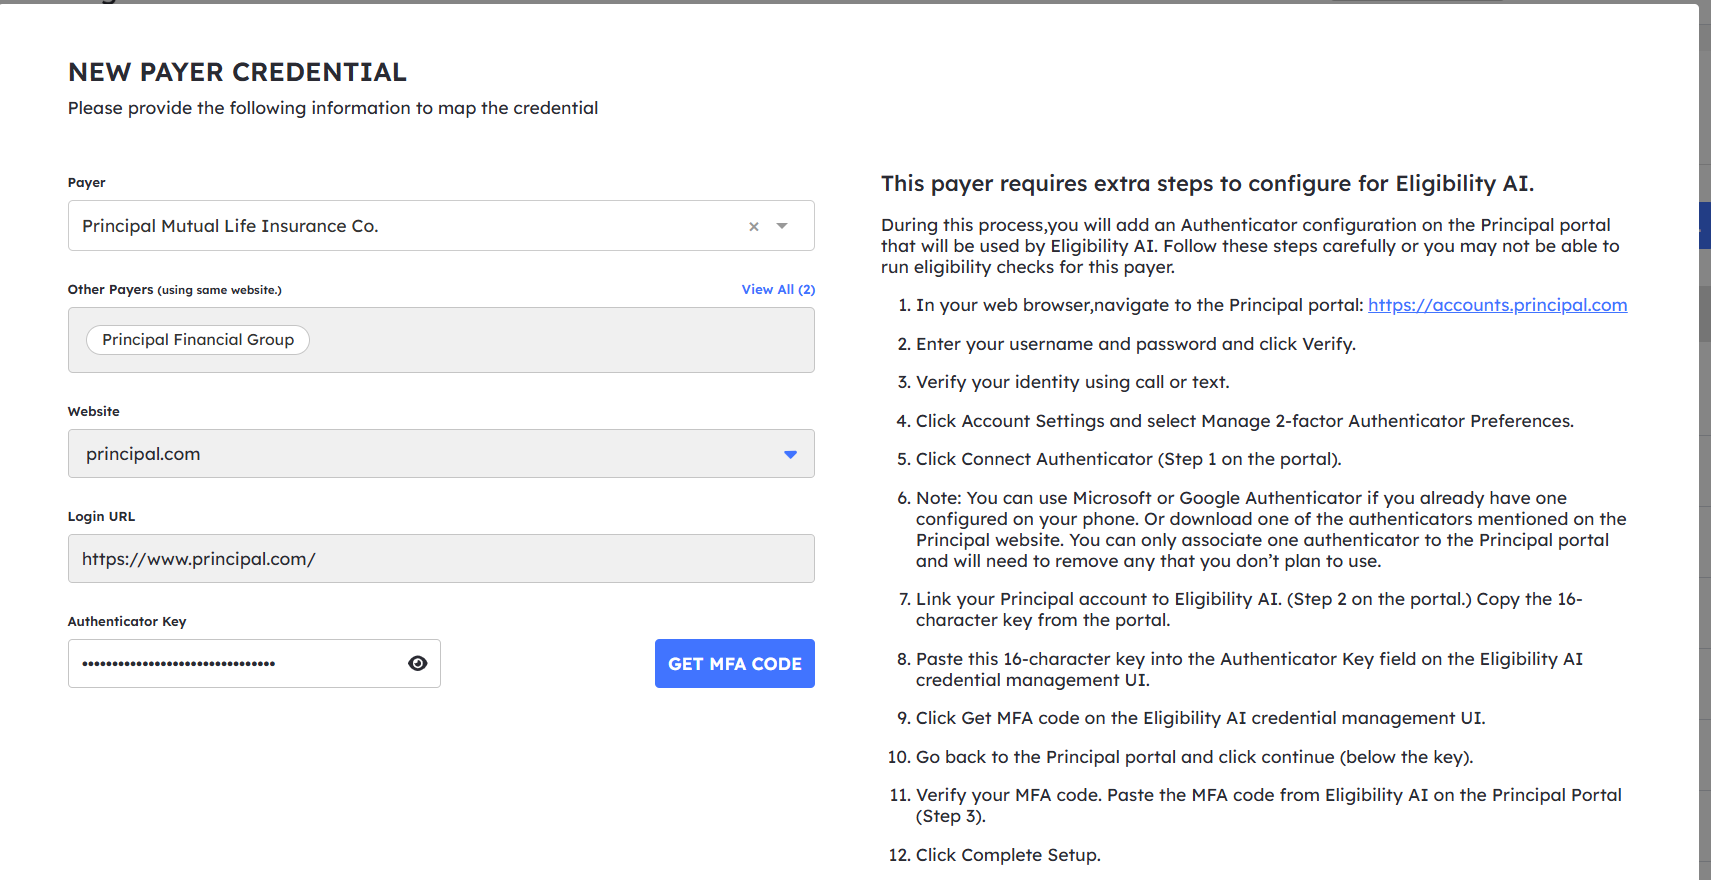
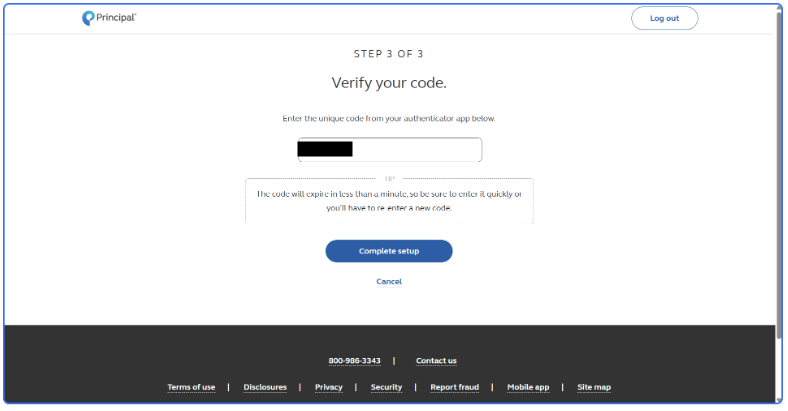
- Now that the authenticator key has been copied, go back to the account setup in Principal; click “Continue”. Then in Eligibility AI, click "Get MFA Code". Copy and paste this code into Principal.
- Click "Complete Setup" to finish the verification process.
- Choose Principal as the payer and enter the required information. Paste the secret key into the Authenticator key field.
- Your new Principal credential should now be ready to be used with Eligibility AI.