Adding an Attachment to a Claim
 Updated
by Lindsey Schurman
Updated
by Lindsey Schurman
When a Claim requires an attachment, it will be present under Claims Needing Attachments.
- Select Claims Needing Attachments to view all claims waiting for you to add an attachment based on the preset payer rules.

- Select Attachments Needed or the paper clip icon to select the specific claim and create your attachment.

- The specific rule and requirement for the claim will display in the Attachment creation screen.
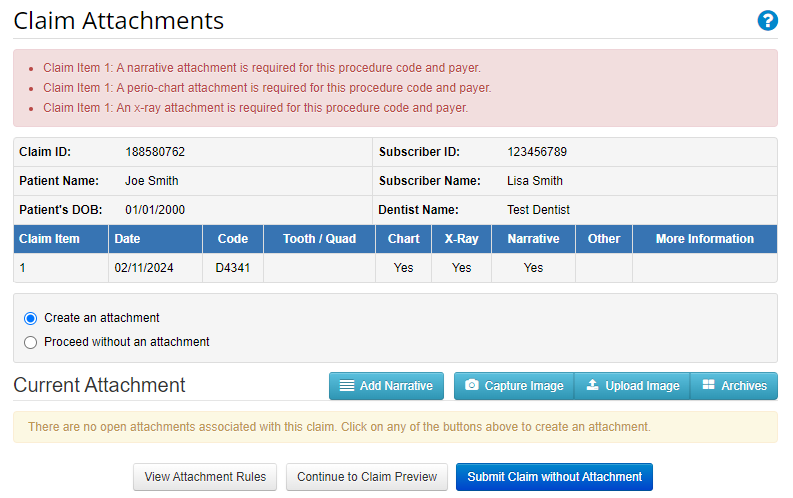
The following attachment options are available:
- Add Narrative
- Capture Image
- Upload Image
- Archives
- Submit Claim without Attachment
Adding A Narrative
- Select Add Narrative, a pop up window will appear. Type the narrative in the box.
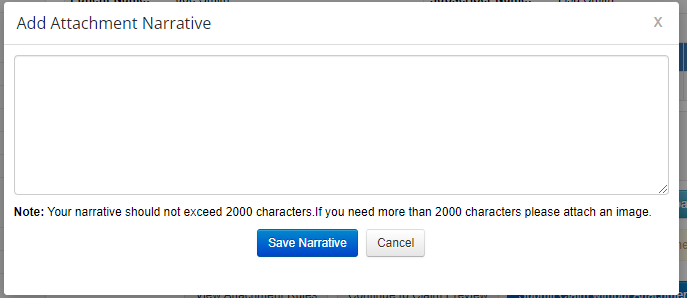
- Select Save Narrative to add to the attachment.
- Select Submit Claim.
Narratives longer than 2000 characters must be attached as an image using the Capture Image or the Upload Image functions.
Capture Image
- Select Capture Image. The DentalXChange Desktop Service application launches.

- On the Practice computer, open the image to be captured. If multiple monitors are used, the application will capture only on the main monitor.

- Select Capture Image. Crosshairs will appear. Use the cursor to draw a box around the image to be captured.
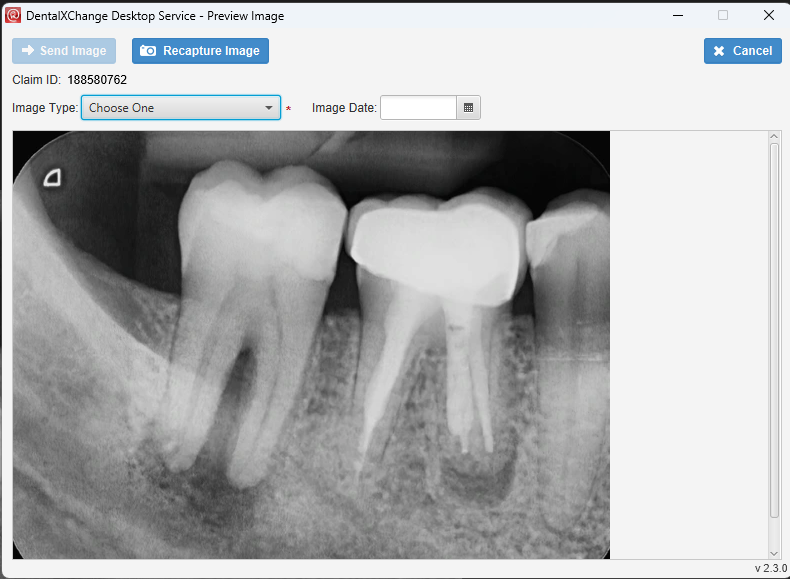
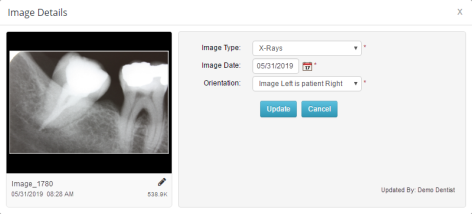
- Select the Image Type, Image Date and Orientation if required. Select Send Image.
- If the image is captured is incomplete, select Re-Capture Image to restart these steps.
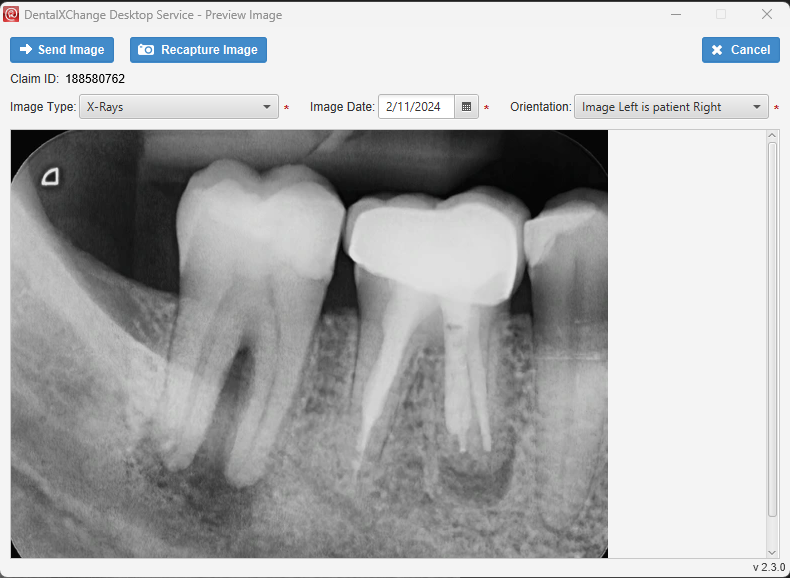
- The screen will display all captured images for this claim, If additional images are required, select Capture Image. If no additional Images, select Continue to Claim to close the application.
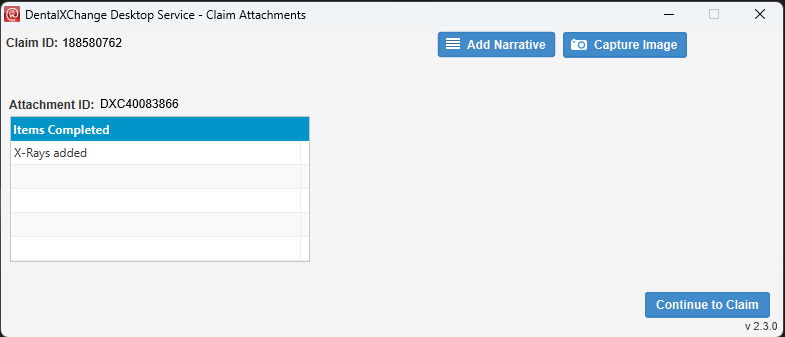
- Select Submit Claim.
Upload Image
- Select Upload Image to upload a file as an attachment.
- A file window will open, locate your image file and Select Open.
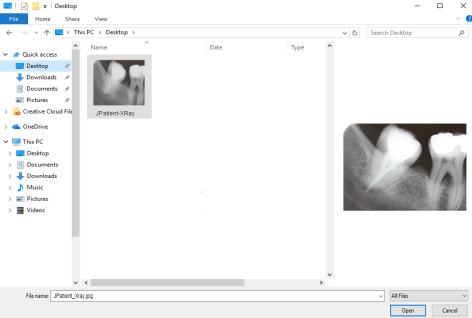 Supported file formats include .jpg, .gif, .png
 - The Image Details Pop-up will open, Select the Image Type, Image Date and Orientation if applicable. Select Update
- Select Submit Claim.
Archives
- Select Archives, the Patient image archives window displays. Patient image archives contain any previously attached images for the patient listed on the claim.
- Choose one or more images.
- Select Add Selected Images to continue
- Select Submit Claim.
Submit Claim without Attachment
- Select Submit Claim without Attachment to bypass the Attachment requirement.