Table of Contents
Introduction to Eligibility AI
Eligibility AI is a platform from DentalXChange that empowers dental offices to verify eligibility and benefits for their patients. Our platform connects directly with the insurance payers to retrieve patient's benefits and display them in an easy to read and organized format. Utilizing an integration to your Practice Management Software, Eligibility AI can verify multiple patients across multiple payers at the same time, all without the office staff lifting a finger.
How it works
- Appointments — Eligibility AI revolves around appointments. These are the patients coming into your dental office to receive care and determining the financial responsibilities is key to providing exceptional service. There are a few options when it comes to getting your appointments into Eligibility AI.
- Practice Management Software (PMS) Integration — If your office uses one of our supported PMS's, your appointments will automatically be synced in real-time.
- Manual Entry — You can enter your appointments using direct data entry. This is a great option if you use a non-integrated PMS or if you don't want to take up time-slots on your schedule.
- CSV Import — You can enter up to 100 appointments at a time using a pre-formatted .CSV template which is easily downloadable from within Eligibility AI.
- API Integration — For those with more advanced configurations, Eligibility AI has a full-service API for creating and managing appointments. You can learn more about our API here.
- Eligibility & Benefit Checks — Once your appointments have been added, Eligibility AI will start automatically running the eligibility and benefit checks one to ten days before each appointment. This happens completely in the background - when you come into the office each day, you'll have a new batch of appointments ready to review!
- Exception Based Workflow — Long gone are the days of running eligibility checks one by one. With Eligibility AI, you can focus on just the appointments without a successful benefit check.
What this means is you have a one-stop-shop to pull all of your patient's eligibility/benefits for any given day, no matter the insurance they have, saving your staff time and providing better patient care at the same time.
Overview
There are four main sections to the Eligibility AI platform: Daily Huddle, Patients, Reports, and Administration.
Daily Huddle
The home page for Eligibility AI is where you'll spend most of your time reviewing appointments and eligibility details.
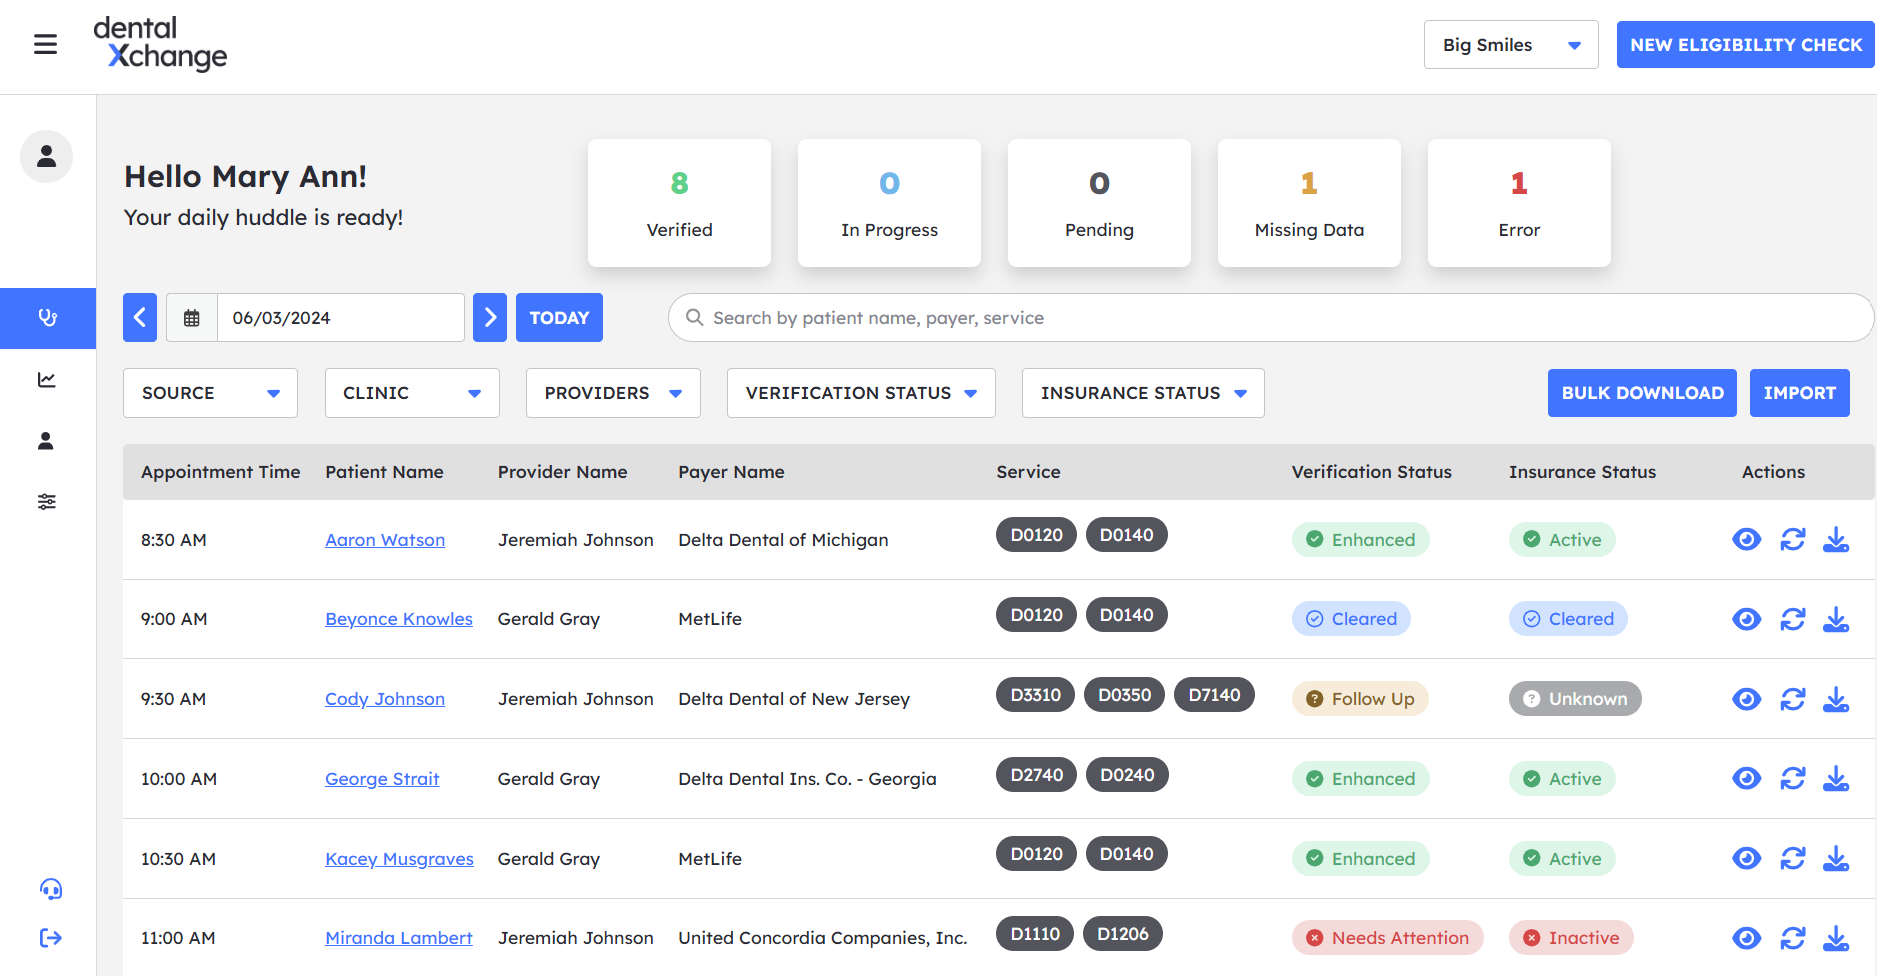
- Calendar — This will let you select a specific date so you can check all the patients that have an appoint on that date.
- Snapshot View — Displays a count of the eligibility checks for the date you choose in the calendar. Includes completed checks, in progress checks, pending checks, and any checks that could not be completed due to missing information or errors. Clicking the number in the snapshot view will display the appointments for that section.
- Filters — Easily find the appointments for the day you picked in the calendar.
Source: lets you filter appointments synced from your PMS, manually added, or from other sources like the API.
Clinic: lets you filter between various clinics or locations, if you have them setup in your software.
Providers: find appointments for a specific rendering provider.
Verification Status: will filter based on the the results of the check (Verified, In-progress, Pending, Error, Failed, Missing-data, Follow-up, Cleared, and Needs-attention).
Insurance Status: filter by the patient's returned eligibility status (Active, Inactive, Pending, Unknown and Cleared). - Appointments — This is where you will see all the appointments for the date you selected in the calendar. You will see the patient's name listed as a clickable link which will pull up the benefits that were run for the appointment. You can click on the "eye" action button to see an overview of the appointment, or the "refresh" action button to re-run that patient's check.
Patients
This section is where Eligibility AI will keep a running log of the patient information from the eligibility checks that were previously run, allowing you to quickly re-run checks for any follow up appointments and view insurance status at a glance.
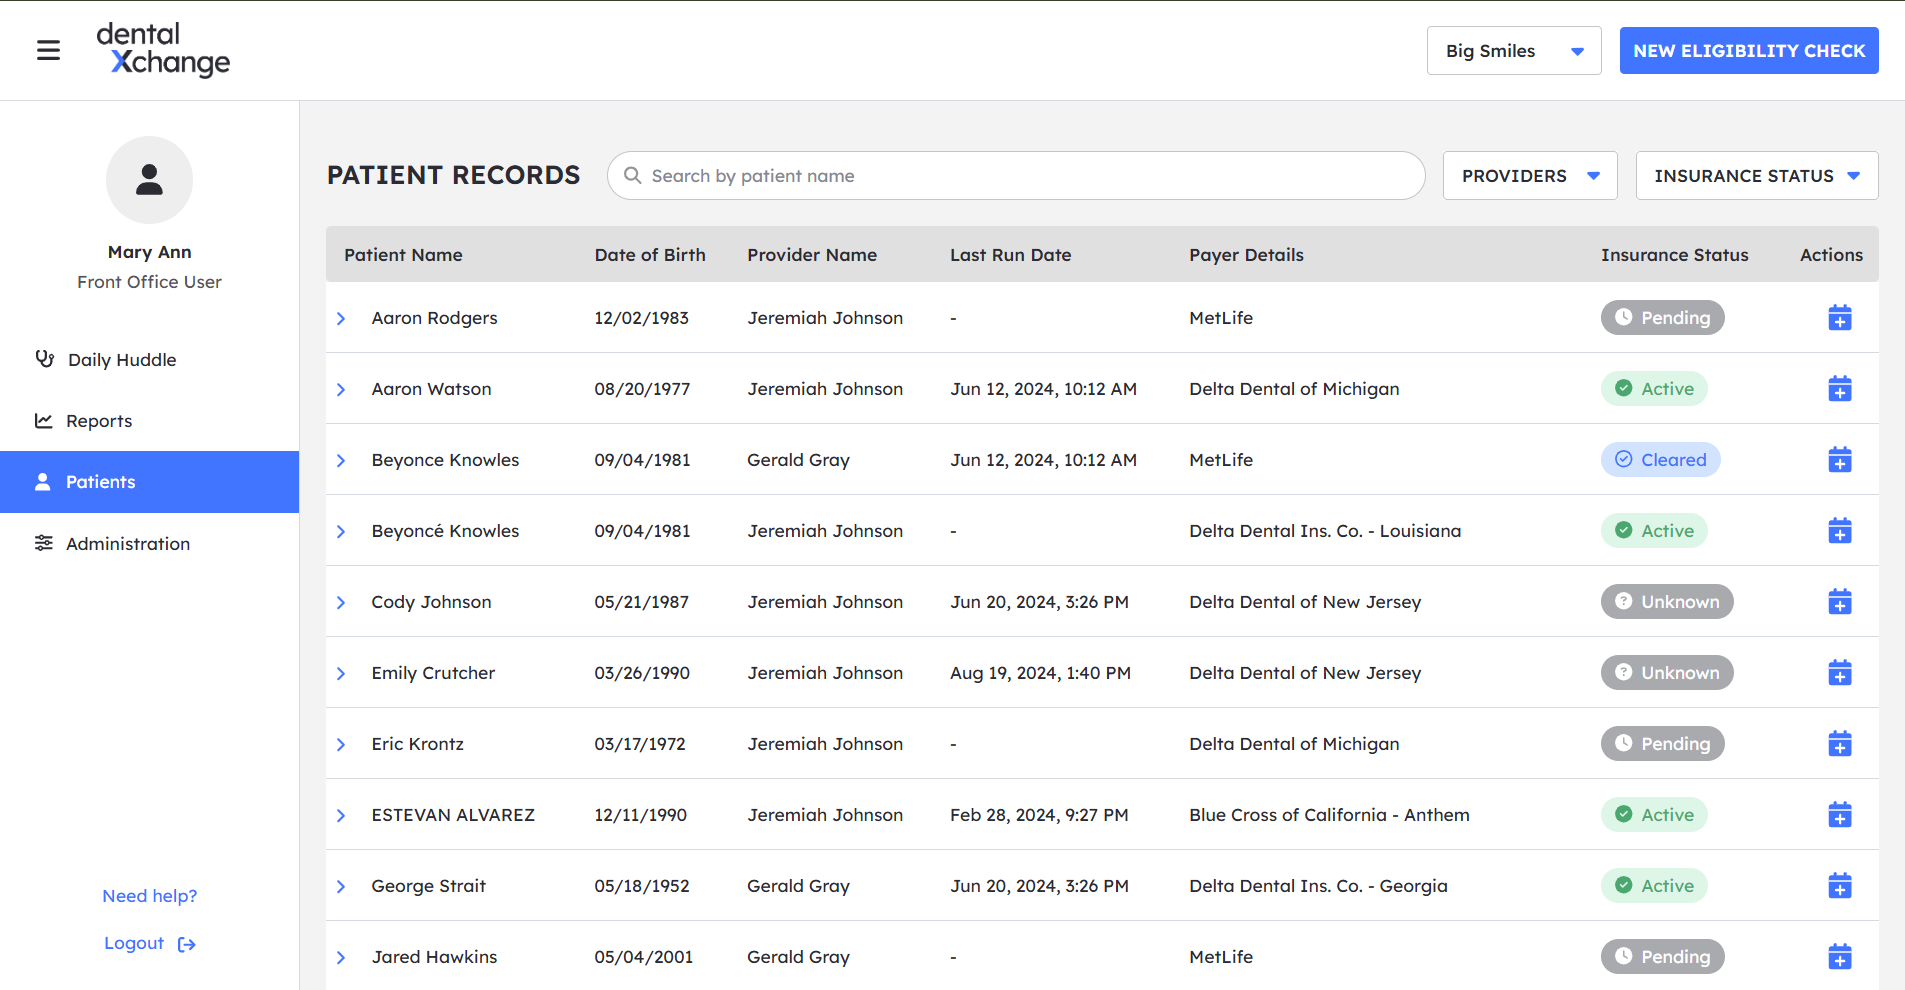
This section will list the patient and their DOB, the last provider who rendered services for them, last run eligibility check date, the payer that the check was pulled from, and the most recent eligibility status for that previously run check. To the right under the "Actions" column, you will also notice a blue "+" button on the right side which will allow you to quickly create a manual appointment for the selected patient and be able to run an eligibility check with the current date and time.
To the left of the patient name, you will notice a little blue arrow. By clicking this icon, you will be presented with all the past eligibility checks for that patient.
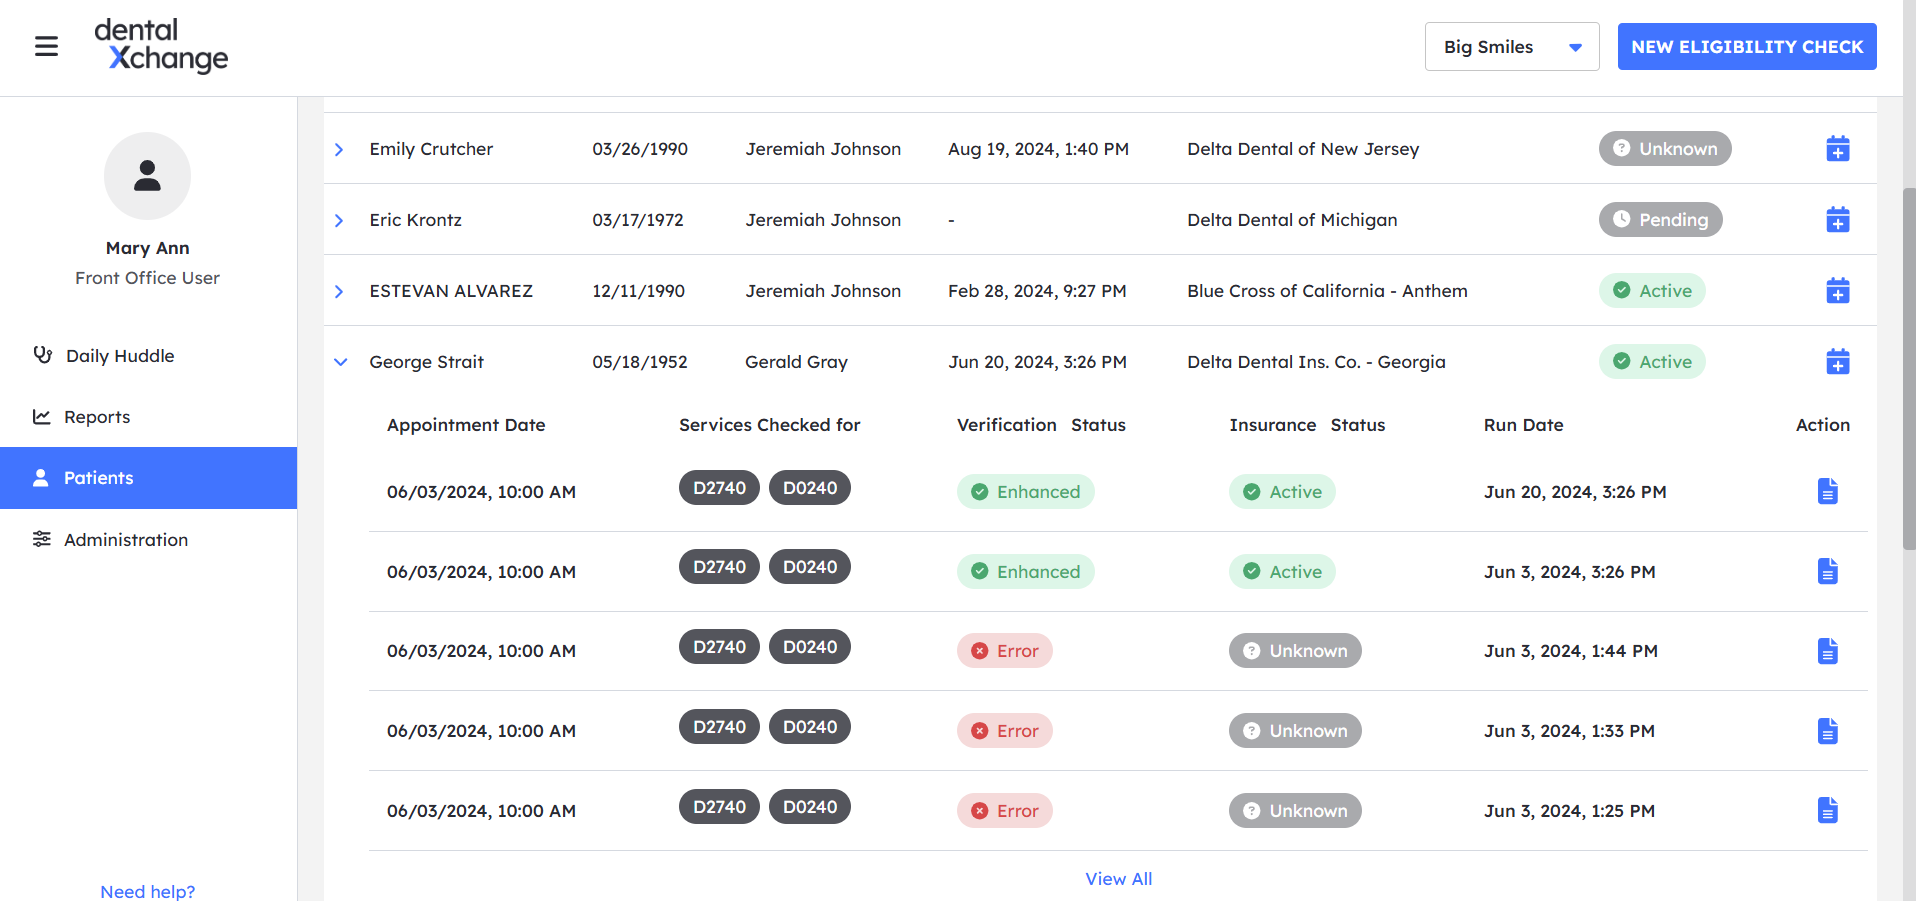
By clicking on the blue "View Report" action button to the right of each appointment, you will then be provided with the "Eligibility Breakdown" for that specific day.
Reports
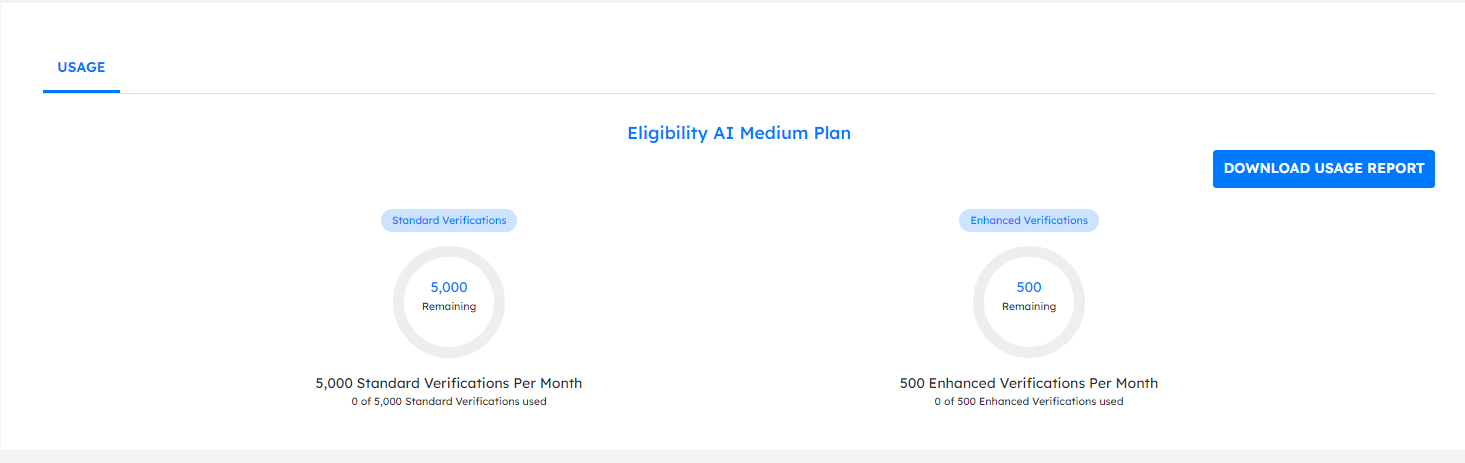
This section shows usage data for your selected Eligibility AI plan. You will see the plan name at the top as well as the number of available Enhanced and Standard Eligibility checks you have for the month. Below the number of available checks you'll also find the number used.
Administration
This is the section where you will handle any setup required for the Eligibility AI platform. By default, you will be taken to the Schedule Settings portion of the administration section.
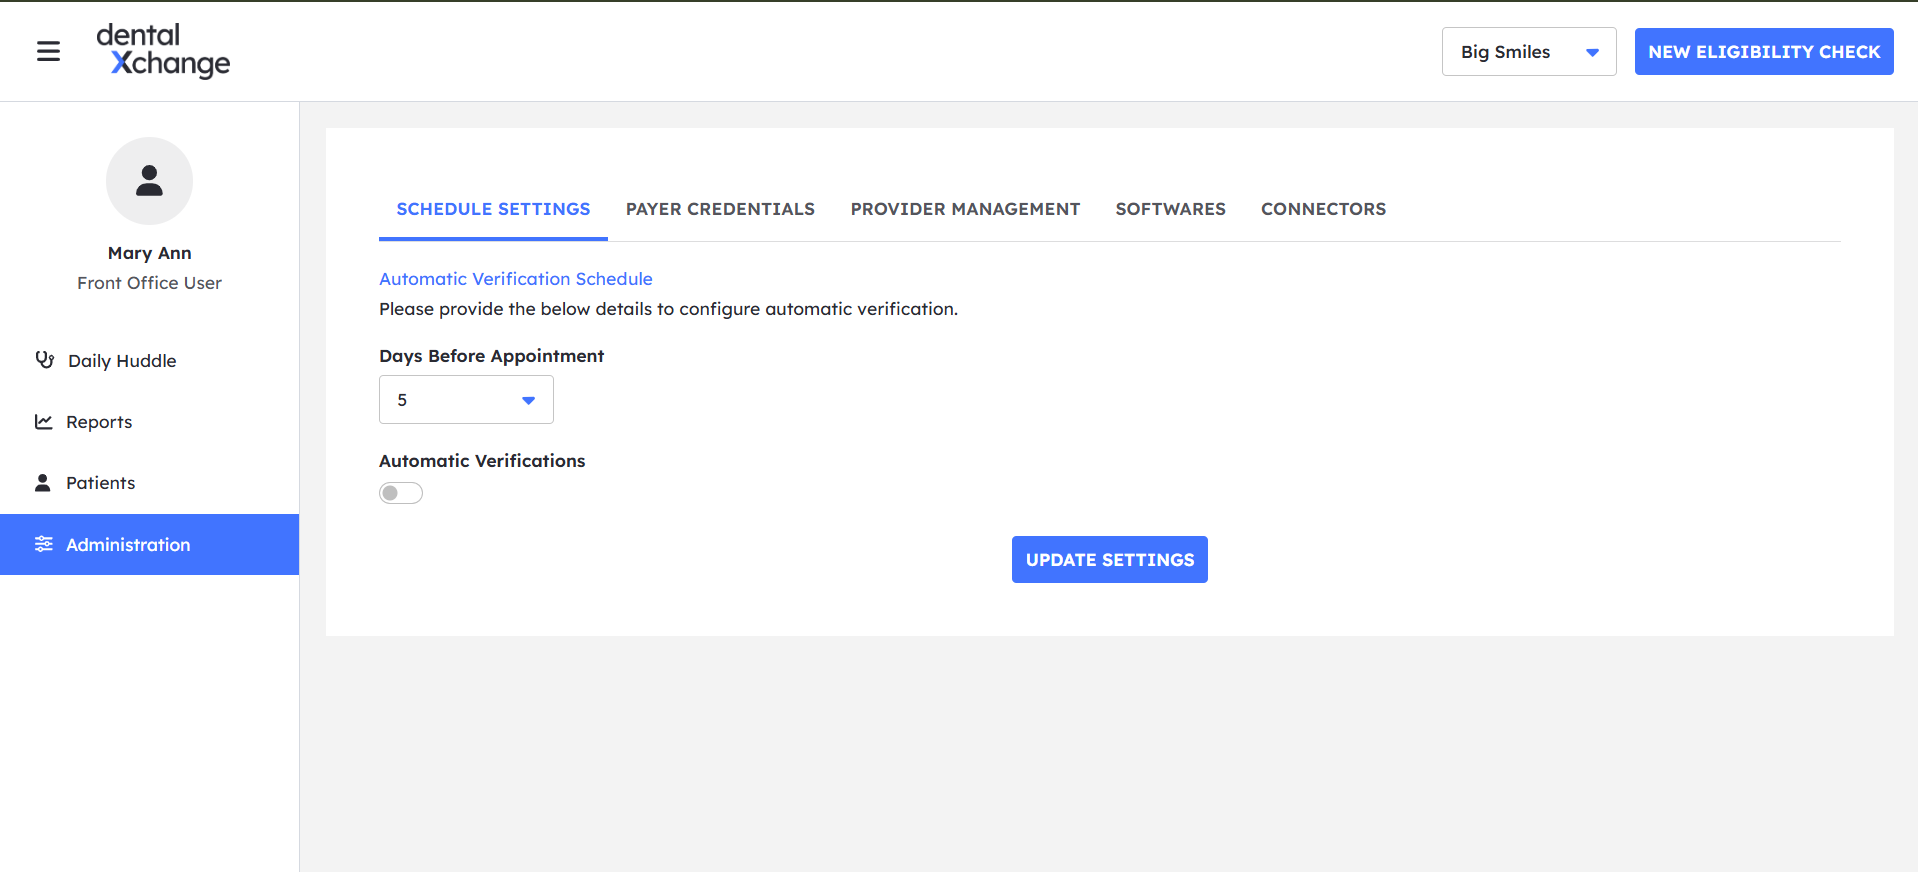
- Schedule Settings — This is where you can configure the Eligibility AI platform to automatically pull eligibility for patients. Simply select the number of days before an appointment you would like the checks to be run and let the platform do the rest!
You can also turn off Automatic Verifications if you prefer to run each eligibility check manually. You can run each eligibility manually from the daily huddle, using the blue "Circular Arrows" button under the actions column.
- Payer Credentials — In this section, you will add your usernames and passwords you have for the various insurance company portals. This is what will allow the eligibility platform to connect directly to the payer's system when it attempts to pull benefits.
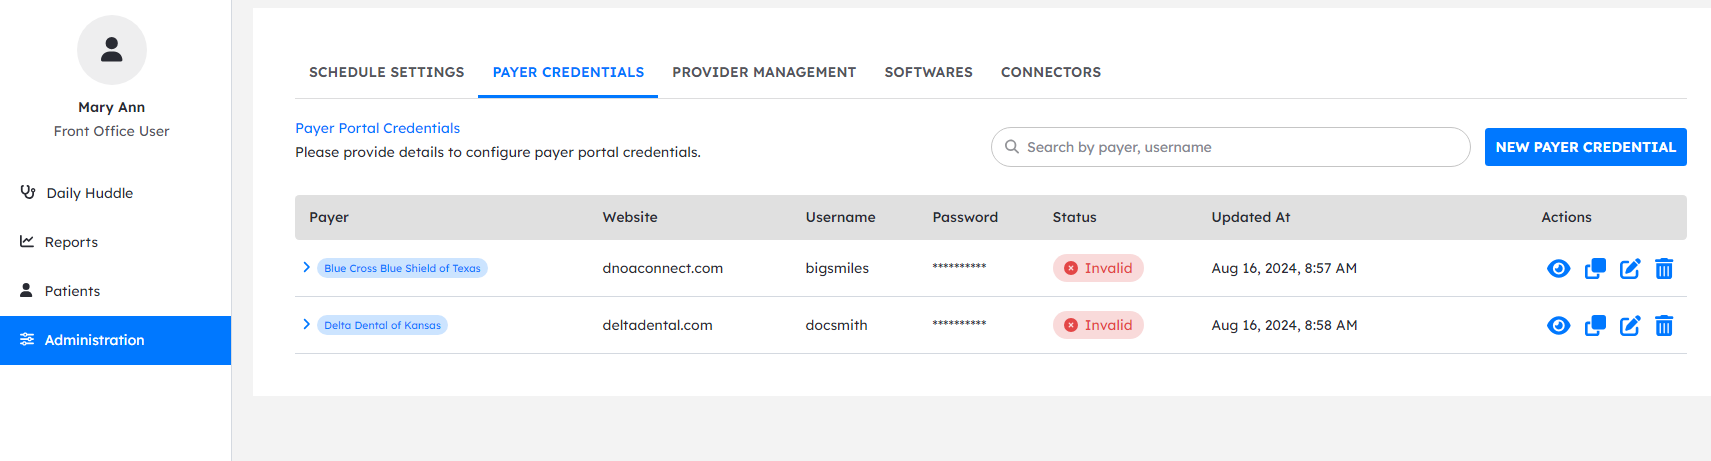 If there are multiple payers that use the same website, they will be all grouped together and you will only need to enter one username and password. (An example can be shown in the screenshot below)
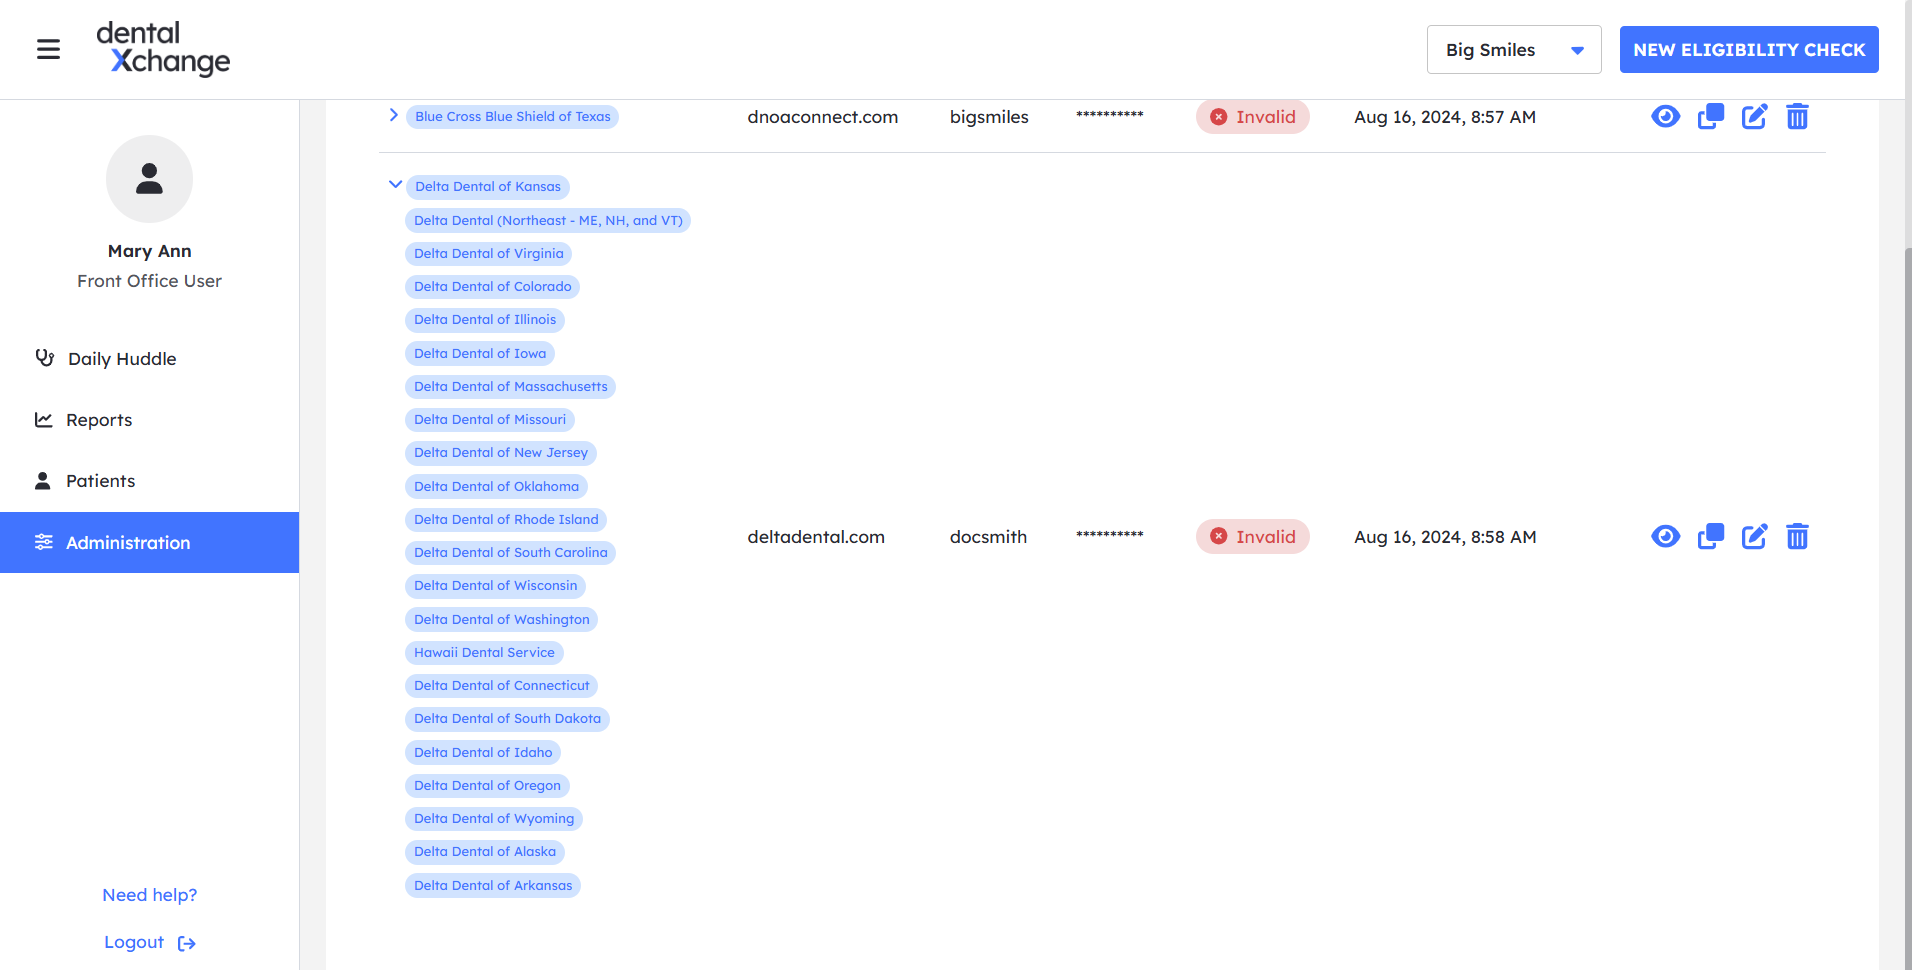 Some payers may require Multi-factor Authentication for their portals. Check out the Multi-factor Authentication article for additional steps.Here you will see the payer the credential is for, the website being used for the eligibility checks, username and password for the payer's site, the date/time the credentials were last updated, and a number of action buttons.
- The "Eye" button will show the saved password for the payer's site.
- The "Double-Page" button willow allow you to use those same credentials for a different payer.
- The "Pad and Pencil" button will let you edit the saved username and password for a payer's site.
- The "Trashcan" Button will delete the saved credentials for a payer's site.
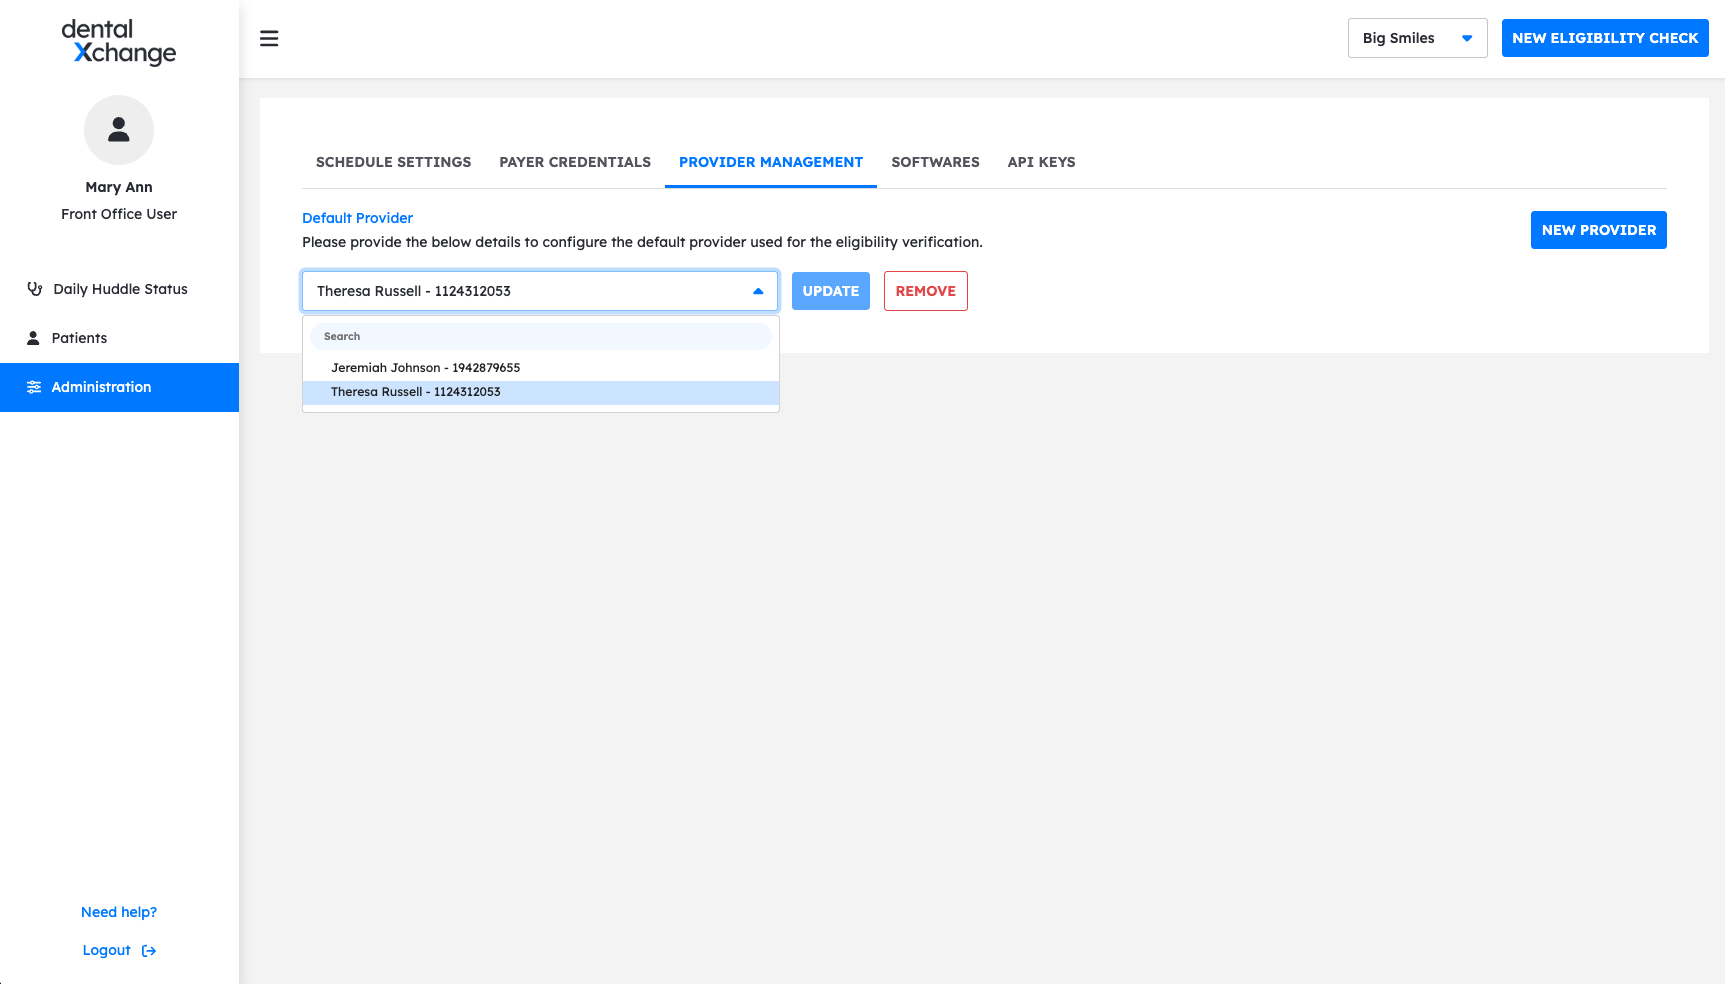
- Provider Management — This section is used to add or select a "Default Provider" in the event there isn't one selected in the appointment already in the PMS. It keeps a list of previously used providers and you can choose one those for the default or simply add a new one. To add a provider, simply click on "New Provider" enter their first and last name, NPI and TIN, and they are added.
- Softwares — Here is where you can download the software necessary to connect your Practice Management Software to Eligibility AI. Our implementation team will guide you through this process during onboarding but it's always here in case you need it later on.
- Connectors — This portion will allow you to generate an API Key to add to your software. Simply click "new API Key" and select your software to generate the key. It will be listed on this page. There are also action buttons on this page as well:
- The "Eye" button will display the API Key.
- The "Double-Page" button will copy the key to your clipboard.
- The "Trashcan" button will delete the key.Use caution when deleting API Keys!
If you delete a key which is being used to sync your appointments from the PMS, you will need to contact DentalXChange support to reconnect your PMS.