Creating an Application
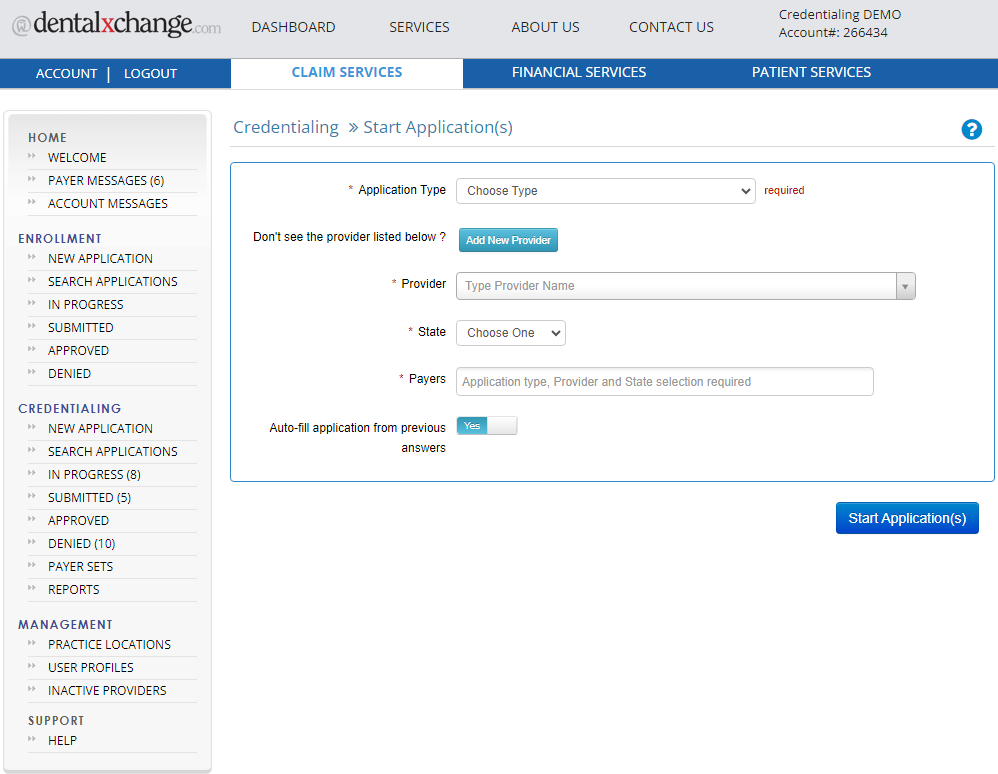
- To begin a new application, select the New Application link under Credentialing in the navigation bar on the left.
- Select the Application Type: Credentialing, ReCredentialing, or one of the other options listed.
- Select the Provider you would like to complete the application for, or click the New Provider button to add a new provider not currently available in the drop-down.
- Select the State.
- Select Payer(s) from the list of available payers that you would like to start application(s) for. The ability to select multiple payers under the Payers option is available.
- If you would like CredentialConnect to auto-fill answers and supporting documents from previous applications, slide the selection to Yes. If you want to start with a completely blank application, slide the selection to No.
- Select Start Application.
- If multiple payers are selected, the user is prompted to Select Payer to Start Working. Applications will be started for all of the payers selected, but they will need to be completed one at a time.
Step 1: Application Forms
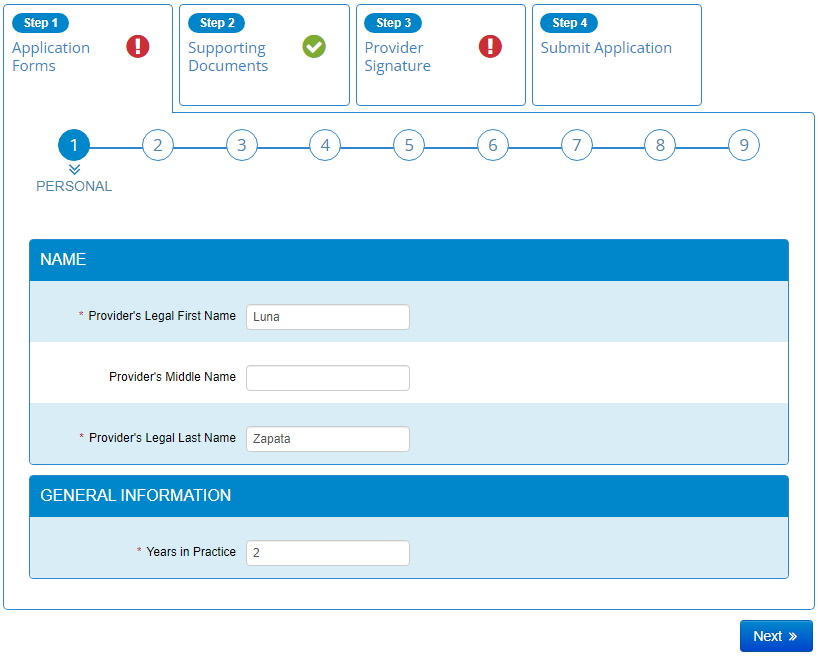
Questions required by the payer are marked with a red asterisk. Answer all required questions in each section. Your answers are automatically saved as you navigate between pages, so you can skip a question and come back later. Once all required questions have been completed, the Application Forms tab will change from a red exclamation point to a green check mark.
Step 2: Supporting Documents
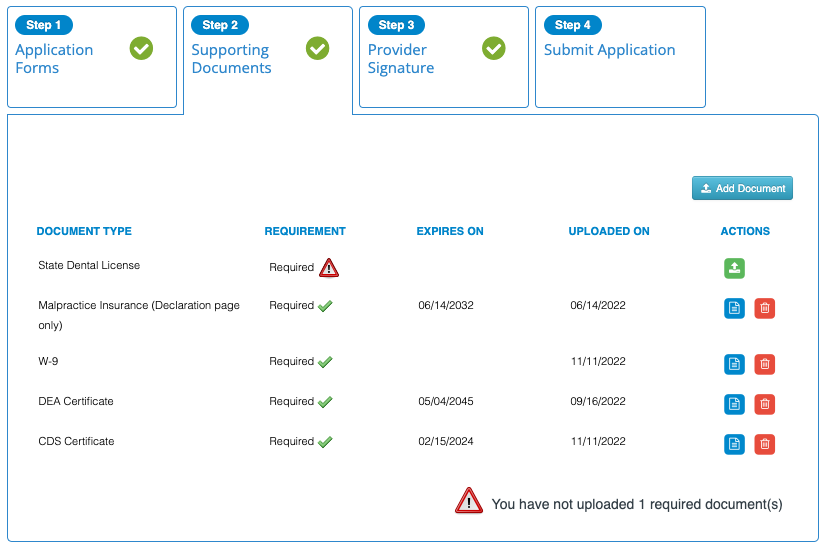
Once you have completed all required fields in Step 1, you will move onto Step 2 automatically. This section lists all documents required by the payer you're completing an application for. Supporting documents that are missing will show an error. The application cannot be submitted without all required documents. Similarly to Application Forms, once all required documents are uploaded, the Supporting Documents tab will change from a red exclamation point to a green check mark.
Step 3: Provider Signature
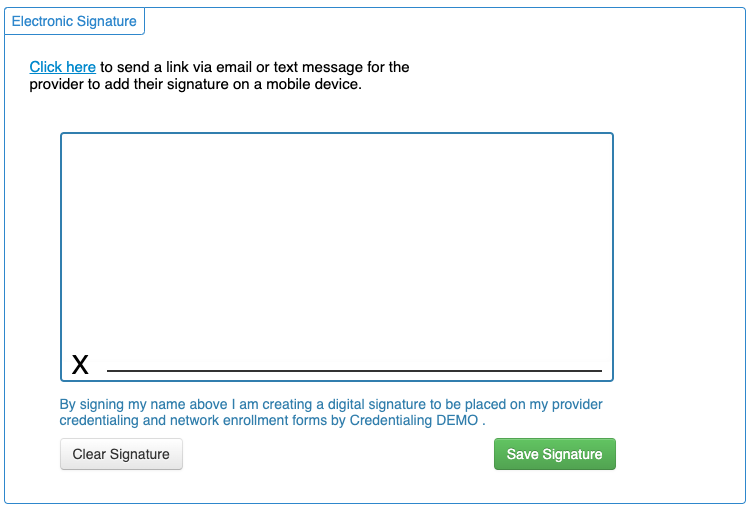
Some application forms require the provider signature to be applied, as well as the owner of the practice, and/or an authorized user. CredentialConnect supports Provider, Owner, and Authorized User signatures.
If the required signatures are not on file, you can send a one time email or text message to that user to add the signature on their mobile device. Additionally, that user can login and capture their signature on their computer. Once a signature has been captured, it will be applied to all forms that require it.
Step 4: Submit Application
The last step in submitting a new application is to review the application documents. You can click the blue paper icon to preview the completed forms in the application before submission.
This section of the application will look differently based on which payer you are submitting an application to. For some payers, the application will be reviewed by DentalXChange before transmitting the application to the payer for processing.
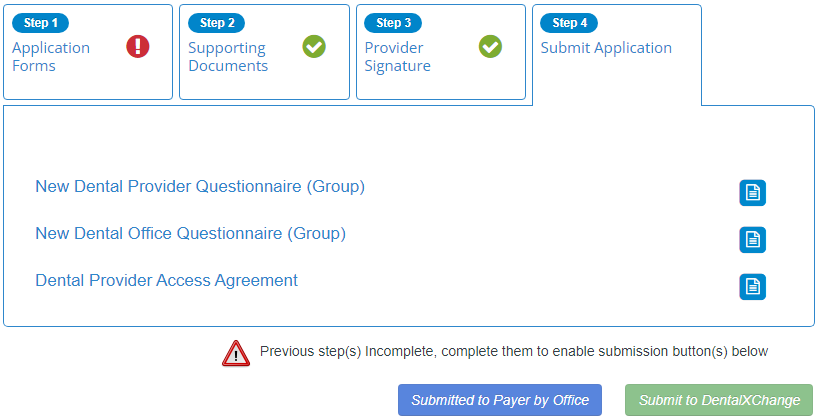
Some payers have two options to submit the application:
- Submitted to Payer by Office is to submit the forms yourself via regular mail or fax.
- Submit to DentalXChange transmits the application electronically through DentalXChange.
Check out the guide below for additional steps on submitting the application using the payer messages feature: