Product Support
PortalPass
Attachments
Adding an Attachment to a Claim
Completing a Payer Request for Additional Details
Creating a Custom Attachment Rule
Creating a Stand Alone Attachment
Download the Attachment Tool
FAQs for AttachmentConnect
Locating the Attachment Payer List
Searching for a Claim with Attachments
Using Capture All Attachments
Statements
Claims
Add or Change Billing Information
Adding Users to DentalXChange
Change Practice Management System
Correcting a Validation Error
Download the Batch Upload Tool
FAQs for ClaimConnect
Frequestly Asked Questions for the DentalXChange Management Desktop
Medi-Cal Dental: Add Payer Claim ID from NOAs to Claims on Submission
Registering for DentalXChange
Resetting DentalXChange Password
Submitting a Claim Directly on DentalXChange
Uploading a Batch Claim File
Credentialing
Credentialing For Providers
Creating an Application
FAQ's for Providers using CredentialConnect
Adding Approvals From Payers
Creating a New Account with CredentialConnect
How to Edit Locked Application Fields
How to Update Expiring Supporting Documents
Introduction to CredentialConnect for Providers
Password Recovery
Payer Messages
Submitting an Application Via Email
Understanding the Homepage
Username Recovery
System Requirements for CredentialConnect
Uploading Files to CredentialConnect
Eligibility AI
Payer Portals- Credential Creation
Ameritas
Carefirst
Cigna
DNoA
Delta Dental State Portals- AK, AR, CO, CT, IL, KS, MA, NJ, OK, OR, RI, SD, VA, WA, Northeast, Delta Covers Me
Delta Dental State Portals- IA, ID, MO, SC, WI, WY
DentalHub- Adding a New Team Member
Geha
Guardian
MetLife- Updating MFA Email
Metlife
Principal
United Concordia
FAQ's for Eligibility AI
Introduction to Eligibility AI
Reviewing Eligibility & Benefit Details
Add Payer Credential with Multi-Factor Authentication
Common Reasons for Failed Benefit Checks
Managing Payer Credentials
Manually Running an Eligibility Check
Notes and Benefit Customization
Merchant Services
CardPointe Portal
How to setup Payment Plans
Notifications & Alerts
Reconcile Merchant Services (PayConnect) Transactions
Video: How to Process a Refund
Video: How to Process a Void
Video: How to Set Up Payment Plans
Video: How to Use Text-to-Pay
Video: How to use the Virtual Terminal
Real-Time Eligibility
Electronic Remittance Advice
Enrollment
Partner Support
- All Categories
- Product Support
- PortalPass
- User Management
User Management

This article will walk you through how to add new users and teams, how to edit existing new users and teams, and how to remove them.
- If you are an administrator, you can view and access the Administration section from the dashboard. User roles and team assignments are made in this section. Administrators can view and edit all users who have access to PortalPass. Additional users and teams are also added in this section.
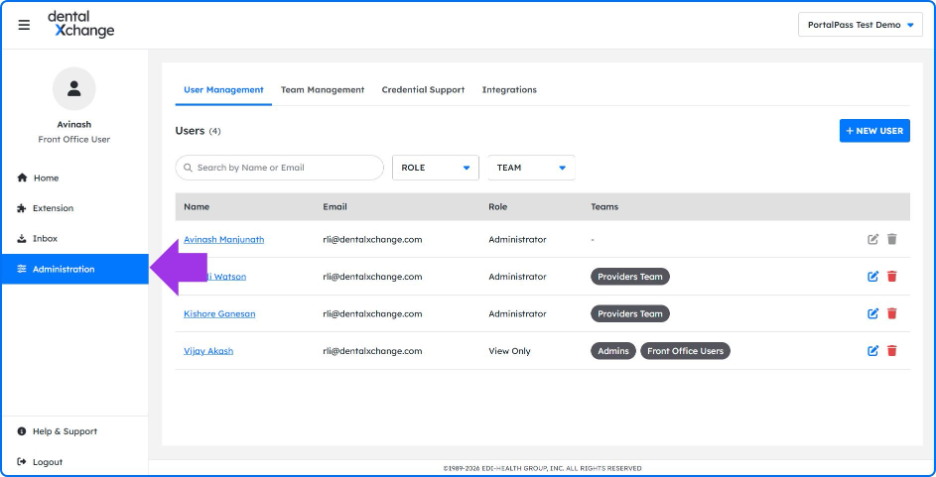
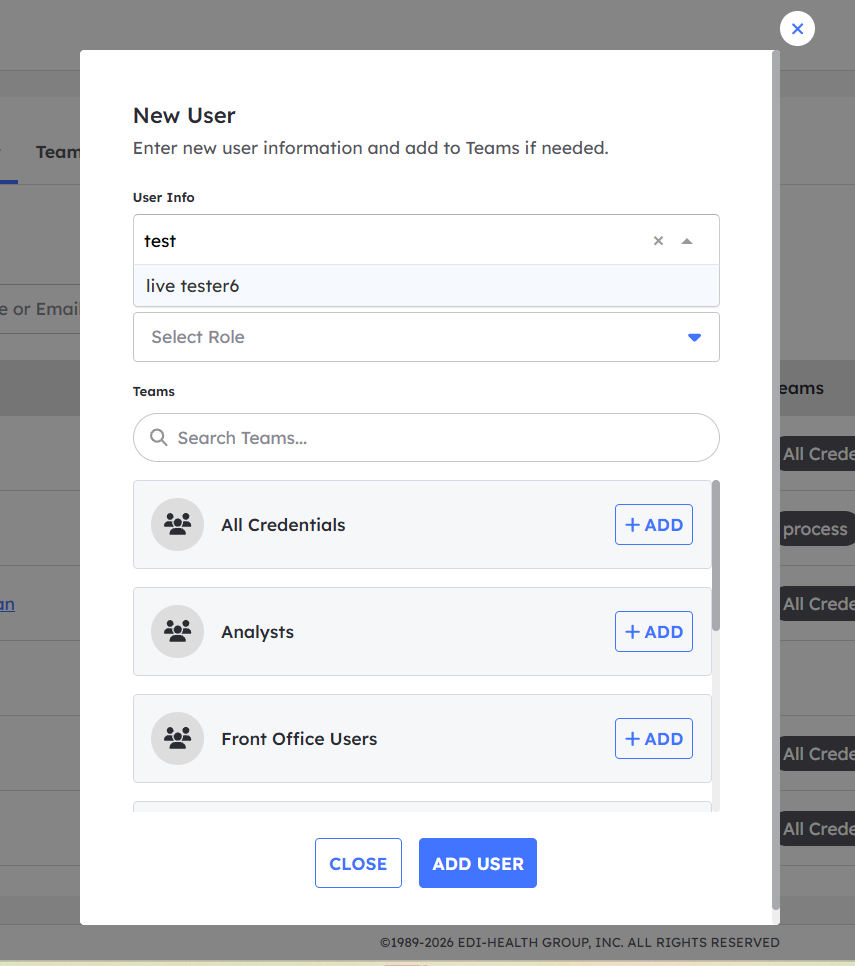
- Add a new user at any time with the '+New User' button. Clicking this button gives a pop-up with the option to search for a user by name. To add one of these users to PortalPass, search for the user you want to provide PortalPass access to, assign a role to the user, then click the '+Add' button if you want to add them to a team. Save these updates by clicking the 'Add User' button. This will give the user PortalPass access, and you will then be able to find the user in the User Management section.
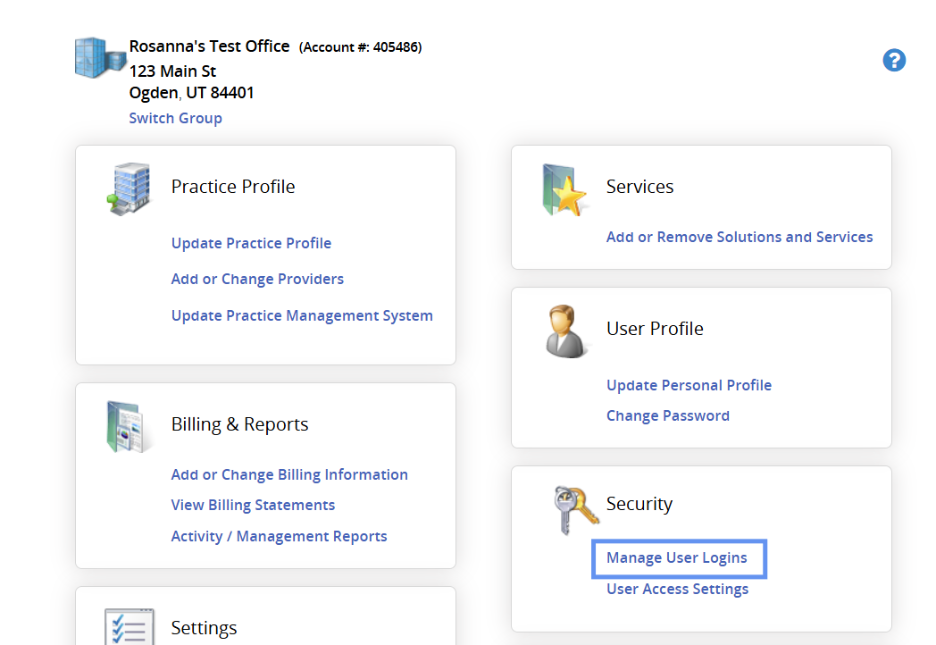
- If a user cannot be found, this means that the user you are trying to add may not have a ClaimConnect login. They can be added by navigating to the Account section in ClaimConnect and clicking 'Manage User Logins'.
- Click ' Add New User '
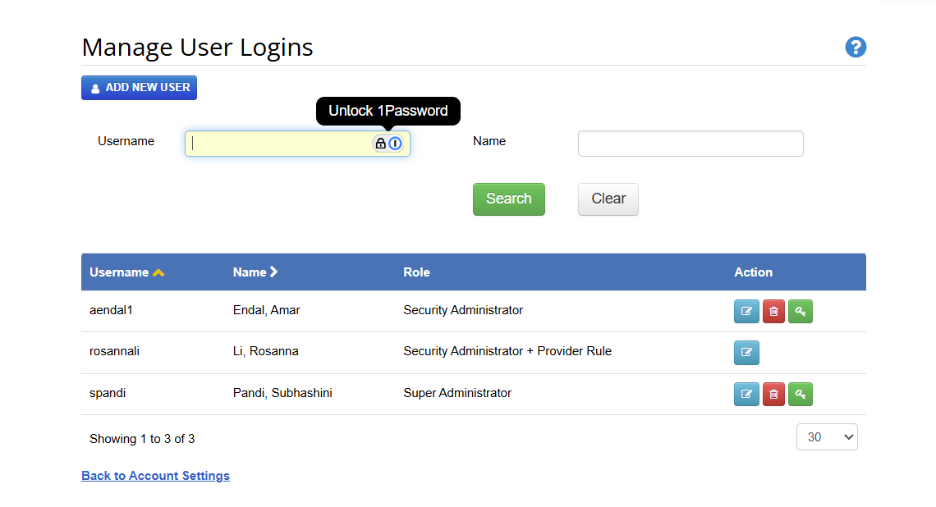
- Fill out the fields to create a new user login
- Once the user has existing ClaimConnect credentials, you will be able to search them in the PortalPass Administration section.
- If a user cannot be found, this means that the user you are trying to add may not have a ClaimConnect login. They can be added by navigating to the Account section in ClaimConnect and clicking 'Manage User Logins'.
- Revoke user access at any time from the User Management list by clicking the trash can icon next to the name of the user to be removed. Confirm your selection for the user’s access to be revoked.
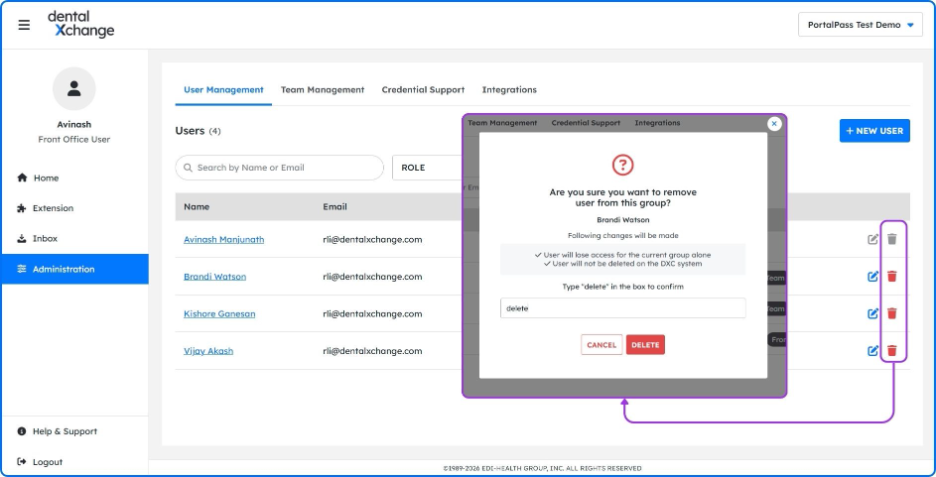
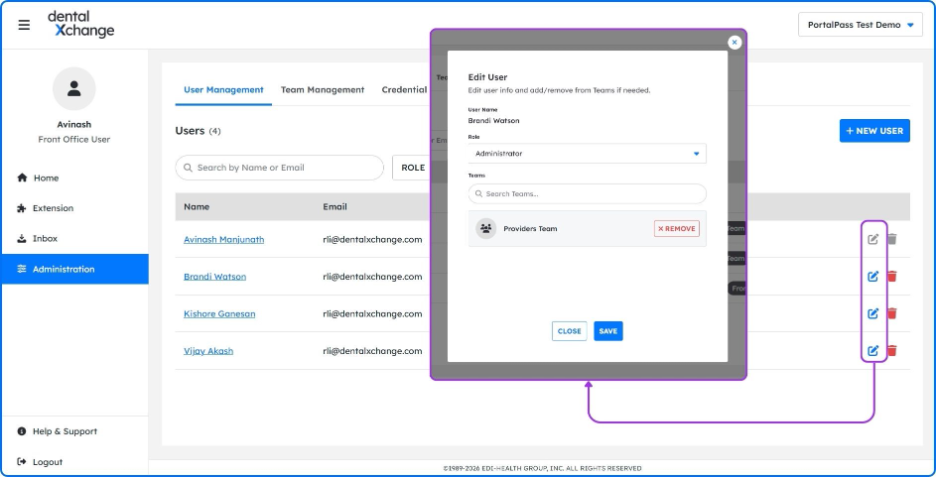
- Edit a user’s role and associated teams in the User Management list. Click on the pencil icon which displays a pop-up that shows the user’s current role and teams. Make any necessary changes and then save your edits.