Product Support
Attachments
Adding an Attachment to a Claim
Completing a Payer Request for Additional Details
Creating a Custom Attachment Rule
Creating a Stand Alone Attachment
Download the Attachment Tool
FAQs for AttachmentConnect
Locating the Attachment Payer List
Searching for a Claim with Attachments
Using Capture All Attachments
Statements
Claims
Add or Change Billing Information
Adding Users to DentalXChange
Change Practice Management System
Correcting a Validation Error
Download the Batch Upload Tool
FAQs for ClaimConnect
Frequestly Asked Questions for the DentalXChange Management Desktop
Medi-Cal Dental: Add Payer Claim ID from NOAs to Claims on Submission
Registering for DentalXChange
Resetting DentalXChange Password
Submitting a Claim Directly on DentalXChange
Uploading a Batch Claim File
Credentialing
Credentialing For Providers
Creating an Application
FAQ's for Providers using CredentialConnect
Adding Approvals From Payers
Creating a New Account with CredentialConnect
How to Edit Locked Application Fields
How to Update Expiring Supporting Documents
Introduction to CredentialConnect for Providers
Password Recovery
Payer Messages
Submitting an Application Via Email
Understanding the Homepage
Username Recovery
System Requirements for CredentialConnect
Uploading Files to CredentialConnect
Eligibility AI
FAQ's for Eligibility AI
Introduction to Eligibility AI
Reviewing Eligibility & Benefit Details
Add Payer Credential with Multi-Factor Authentication
Common Reasons for Failed Benefit Checks
Managing Payer Credentials
Manually Running an Eligibility Check
Notes and Benefit Customization
Merchant Services
CardPointe Portal
How to setup Payment Plans
Notifications & Alerts
Reconcile Merchant Services (PayConnect) Transactions
Video: How to Process a Refund
Video: How to Process a Void
Video: How to Set Up Payment Plans
Video: How to Use Text-to-Pay
Video: How to use the Virtual Terminal
Real-Time Eligibility
Enrollment
Partner Support
- All Categories
- Product Support
- Merchant Services
- Reconcile Merchant Services (PayConnect) Transactions
Reconcile Merchant Services (PayConnect) Transactions

Overview of Reconciliation
There are two main tools in PayConnect used for reconciliation:
- Transactions – Used to review individual payment details.
- Batches – Used to reconcile daily totals against your bank deposits.
Most reconciliation is done using Batches, with Transactions used for deeper investigation if something doesn’t match.
Log in to PayConnect
- Sign in to your PayConnect account.
View Individual Transactions (Detailed Review)
Use this step when you need to look up or investigate a specific payment.
- Navigate to the Transactions tab.
- Review the list of individual transactions.
- Use the search bar to find transactions or apply the filters as needed
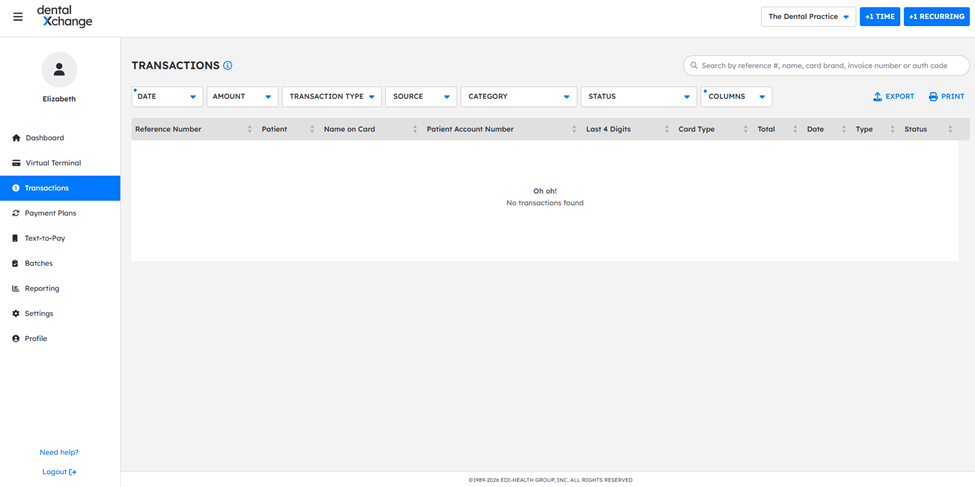
Export or Print Transactions
- Apply any date filters needed in the Transactions view.
- Export or print
- Use the report to:
- Save documentation for internal records or audits
Review Batches for Bank Reconciliation
Batches are the main tool for reconciling with your bank account.
- Navigate to the Batches tab.
· Each batch represents one day’s worth of transactions.
o Each line = one day
o Displays the total amount processed for that day
Compare the total to the deposit shown on your bank statement for the same date.
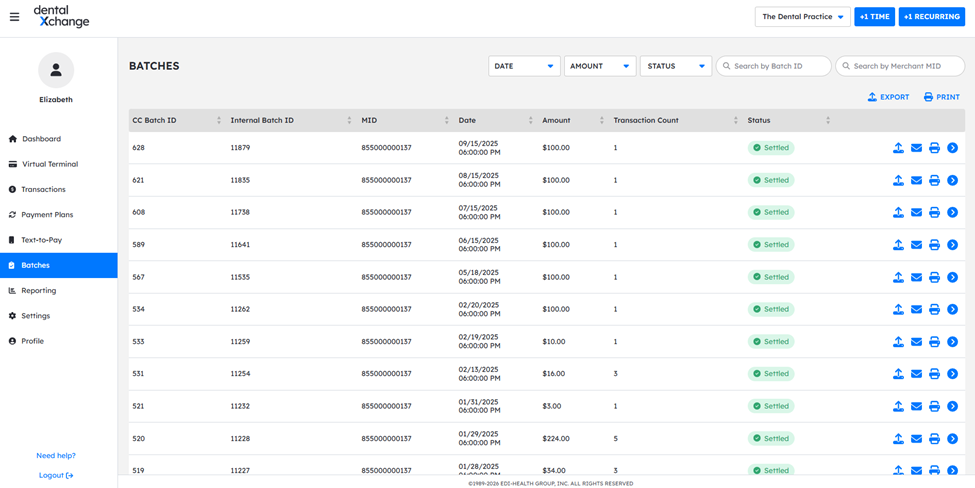
Make sure the total deposited into your bank matches the total processed for that batch.
Export or Print Batch Reports
To make reconciliation easier:
- Apply any date filters needed in the Batches view.
- Export or print.
- Use the report to:
- Compare totals side‑by‑side with your bank statement
- Save documentation for internal records or audits